Once you have installed the latest version of WordPress (wordpress.org), then you can start with the theme install.
For 1st time WordPress users, please have a look at the install guide from WordPress. http://codex.wordpress.org/Installing_WordPress
Download the theme from your ThemeForest Downloads page. You will need to first unzip this file and within the folder locate the ‘stay.zip’ file which will then be used for the theme installation.
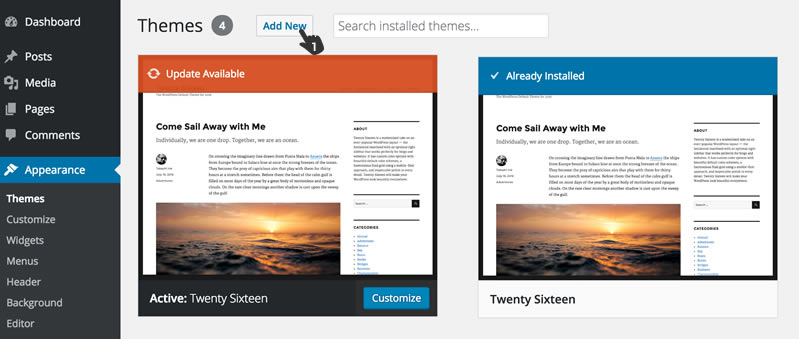
Open your WordPress backend and browse to “Appearance” in the side navigation.
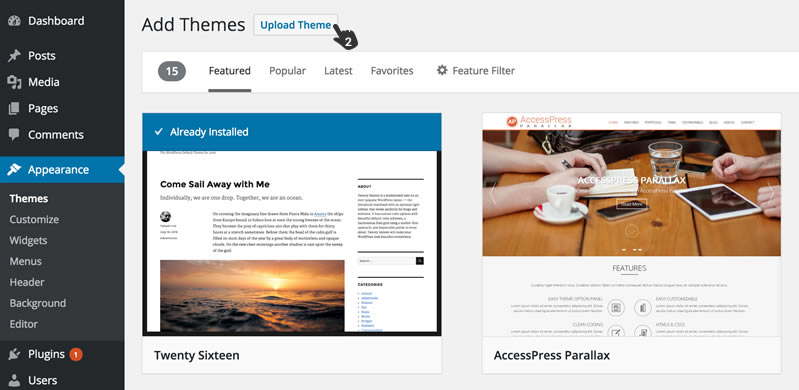
Click on “Themes”. On this page you will find an “Add New” button at the top. Click it and go to the “Add Themes” page. Here you will find an “Upload Theme” button. Click it and upload your ‘stay.zip’ zip file.
You will now see an “Install Now” button, which you can now click to install. This process will take a few seconds.
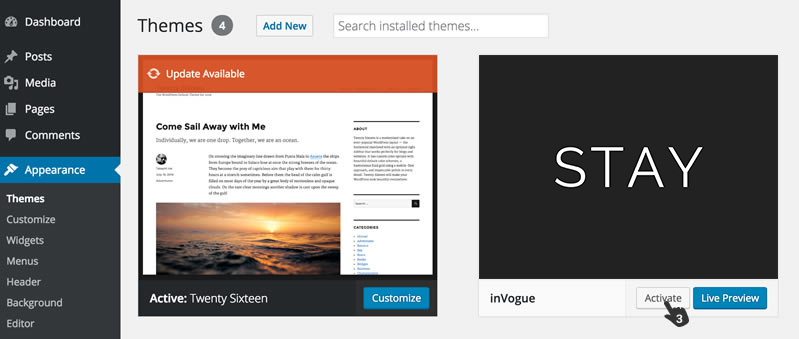
After successfully uploading of the theme, you will now see the theme displayed with the other standard themes and you can now activate Stay by clicking on the “Activate” Button.
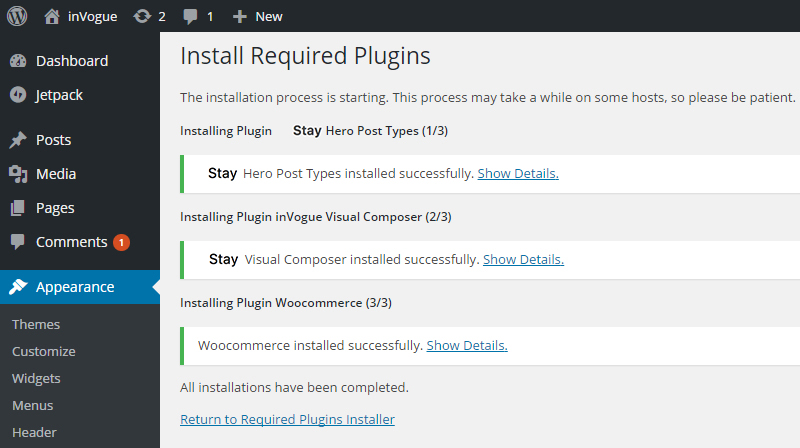
After you have activated the theme, you will be presented with a notification at the top of the screen that suggest you install the plugins required for the theme to function properly.
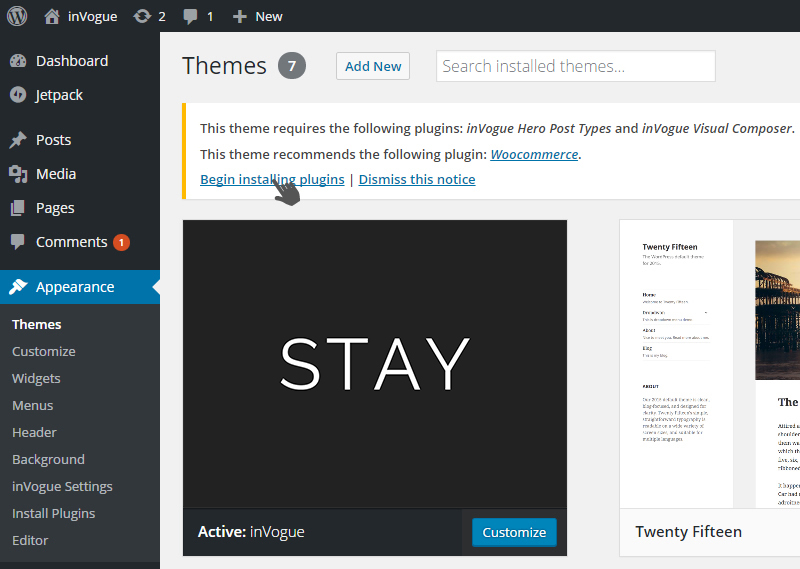
Please install and then activate “Stay Utility Plugin”, “Visual Composer”, “Slider Revolution”, “Go Pricing” and “WooCommerce”.
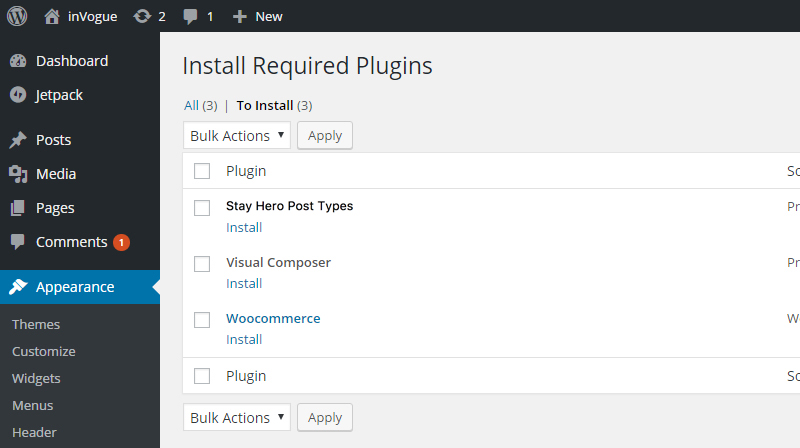
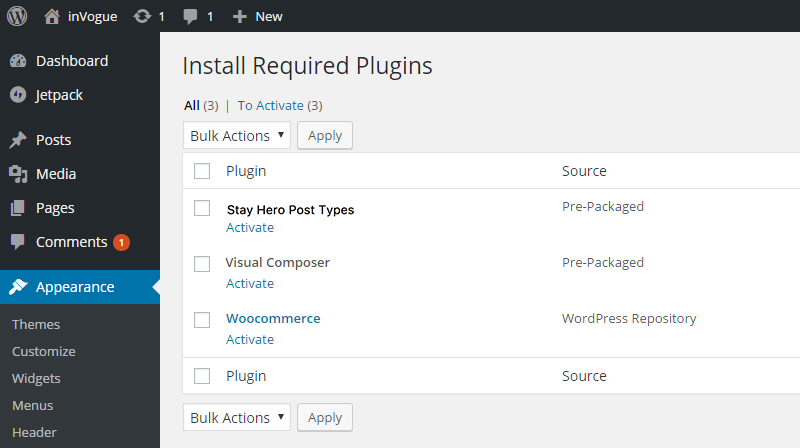
Please note that Stay theme requires these plugins to function correctly. (“Stay Utility Plugin”, “Visual Composer”, “Slider Revolution”, “Go Pricing” and “WooCommerce”)
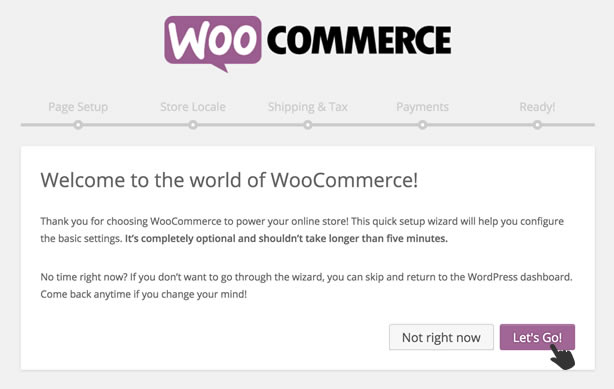
You will now see an alert box at the top of your screen in the WP backend that notifies you to run the WooCommerce setup wizard.

Please finish all 5 steps and start upload your products. Uploading and adding products will be covered further down the page.
Lets start off by setting up a few pages.
Browse to “Pages” in your WP side bar.
Add new page.
Create the pages needed for your website. Home, Shop, Contact, About etc.
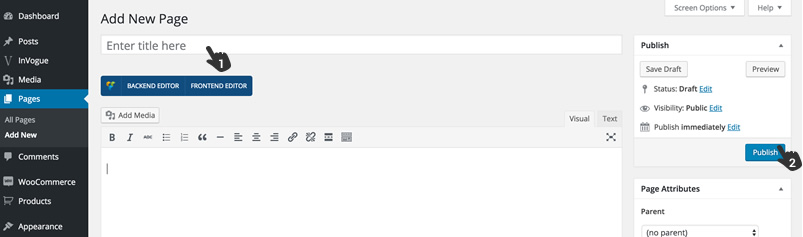
Create a page by adding a page and then press “Publish” in your right hand side bar.
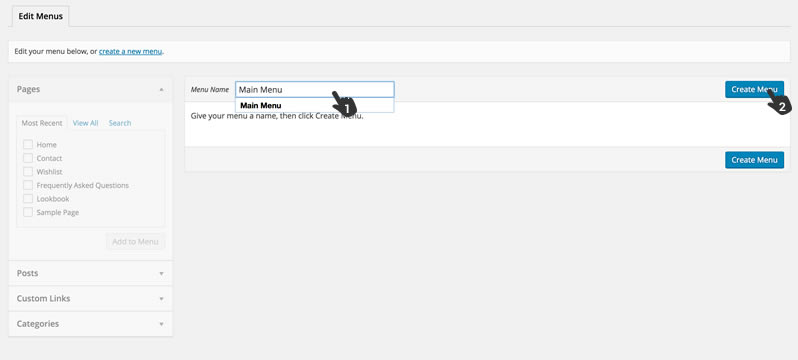
Browse to Appearance / Menus in your WP sidebar
Create a main menu for your site by typing the main menu name and then clicking “Create Menu”
You will see a list of pages on the left.
Select the ones that you want to display in your main menu and click “Add to Menu”
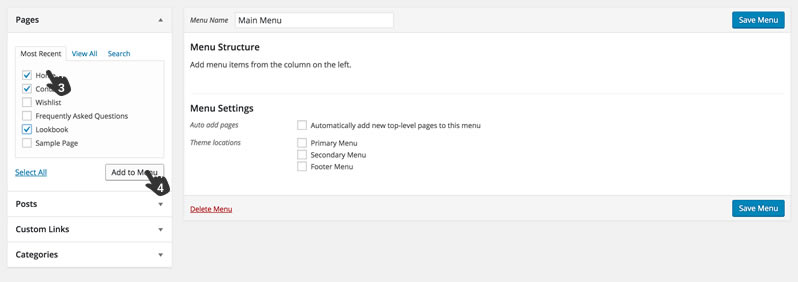
Also make sure that you assign the menu to the right area of the site by going to “Manage Locations” or setting it to Primary Menu as shown below.

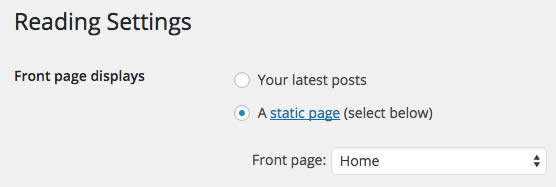
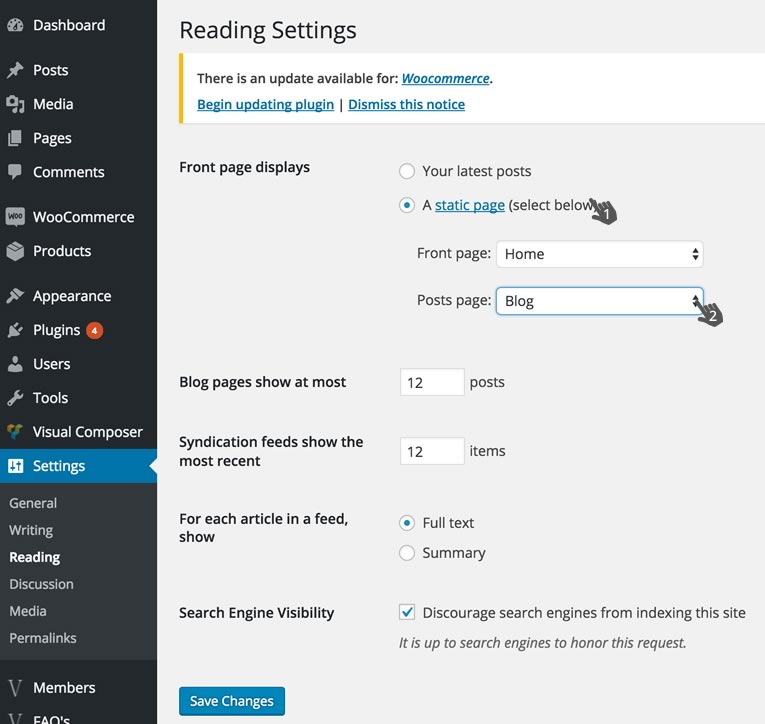
Browse to “Settings / Reading” and click Static Page and then click on the “Front Page” dropdown and select your Home page and Save.
Browse to “Settings / Reading” and click Static Page and then click on the “Post Page” dropdown and select your Post page and Save.
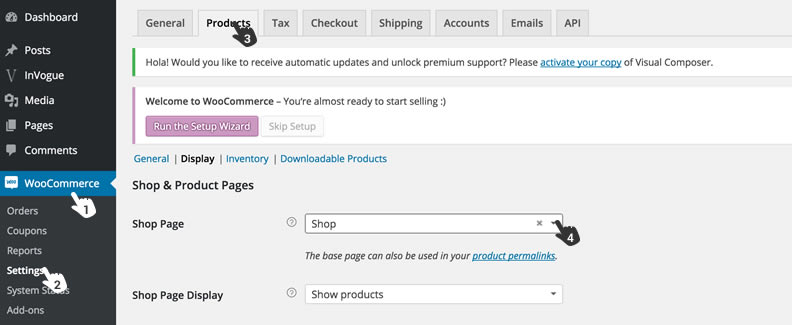
First set up a Shop page like all other pages. Make sure you assign it to the Primary Navigation. Now browse to WooCommerce / Settings / Products. Now assign your “Shop” page from the dropdown in step 4.
Visual Composer is included to build a responsive website and manage your content easily with an intuitive WordPress Front end editor. No programming knowledge required – create stunning and beautiful pages with award winning drag and drop editor.
Please note: For all page elements that contains products or blog posts, you must set these up first. Browse to products in the sidebar and add your products. Also browse to Posts in your sidebar and add your blog posts. Adding products to WooCommerce can be found further down this page.
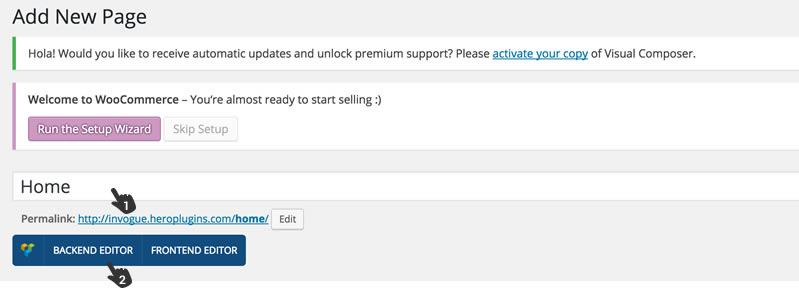
Home Page – Browse to Pages / All Pages and open your Home page.
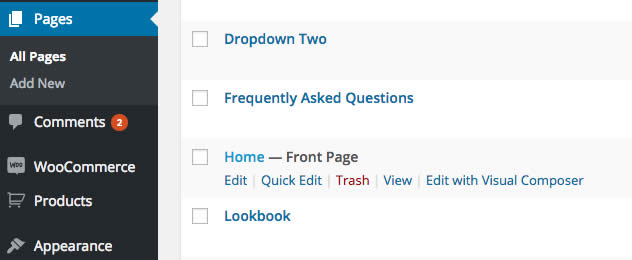
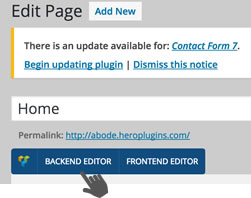
Click on the blue BACKEND EDITOR button and then on the light blue “Add Element” button
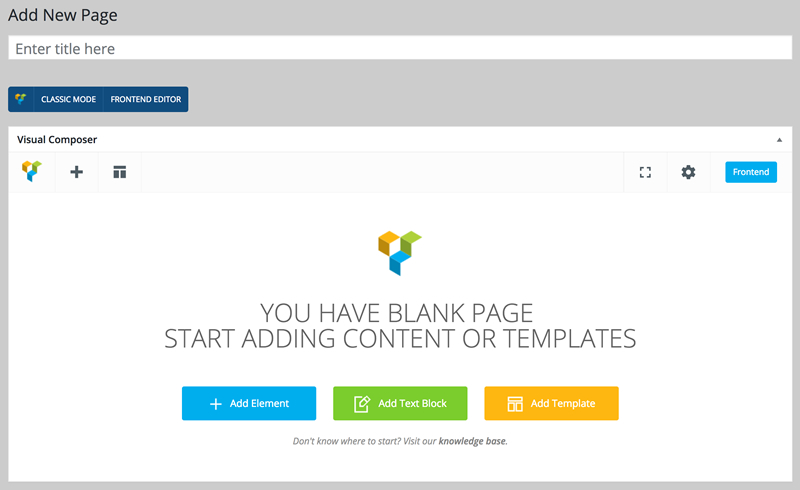
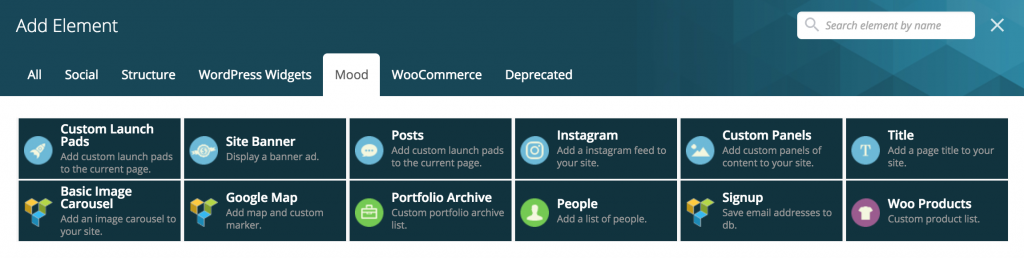
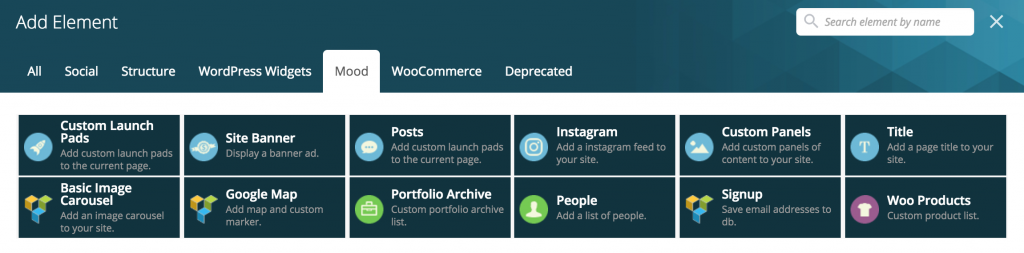
The below popup will now appear and you can start adding elements to your page. Everything you see here was used to create our demo pages.
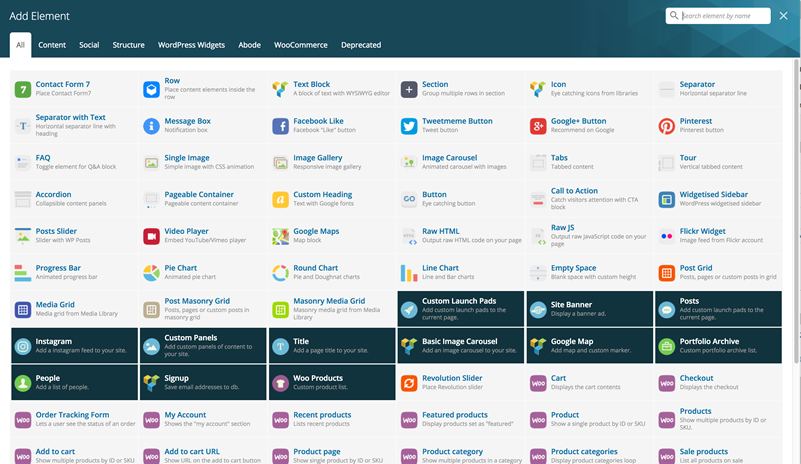
You will click on the element that you want to add and then the element popup will appear for you to edit. Example of a popup below.
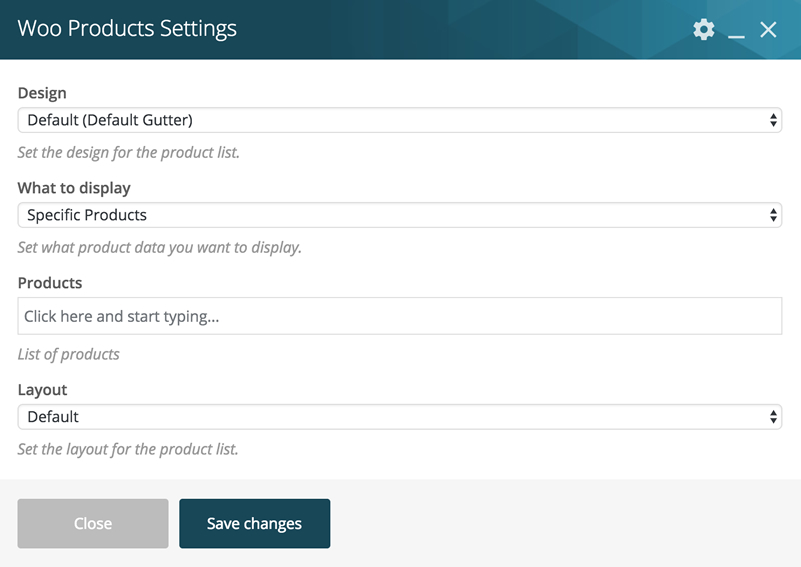
Edit this popup and click Save Changes and you will have the first element on your page.
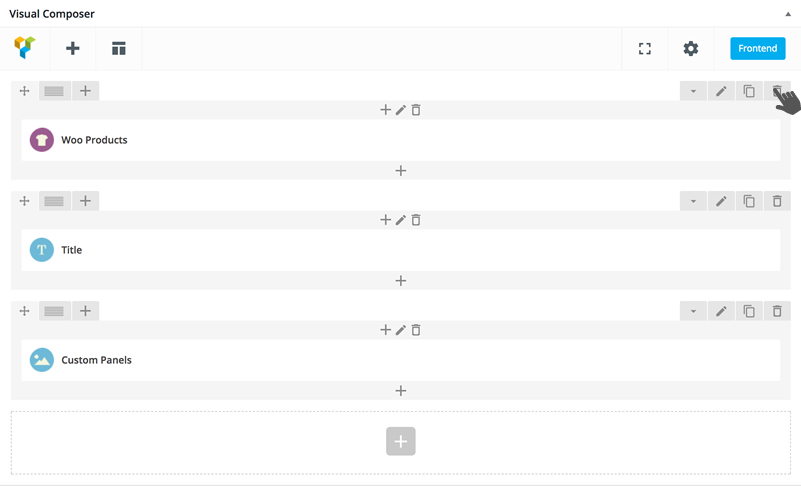
You can now repeat this process and add more elements on the page by clicking on the Plus button.

Remember to hit the “Publish” or “Update” button in your right hand side bar every time you add elements to the page.
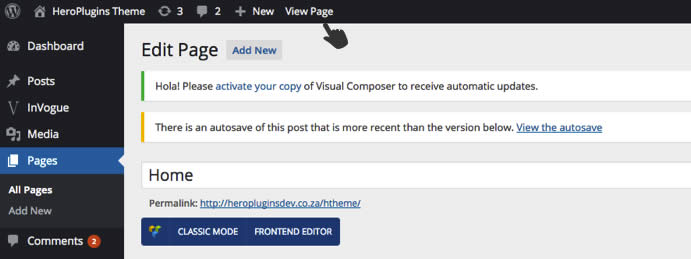
To preview this page in a browser window, click on the “View Page” button in the top gray bar. (Preferably – Right click and Open in new tab)
Keep this preview open in another browser tab so you can flip between the 2 tabs, editing in the one and previewing in the other.
Drag and drop elements on your page by grabbing the arrow and dragging the element up or down to the position you want.

Click on the bin button to delete an element off the page
These are pre built layouts that can be switched on with ease. These demos can be found here. Browse to the Stay settings page via the WordPress side bar Appearance / Stay Settings and browse to the Demos section.
Please note that this is purely the demo layout and no images or products from our main Stay demo site are included. You need to now edit each element and make it your own.
Editing each of these elements are easy and can be found further down the page.
Please also note that some demo pages will need some extra work to make it look exactly like the Stay demo. E.g. if you want the Home page to have a slider at the top, then you have to assign a template to that home page.
Note: With all new demo releases, please make sure you update your theme to the latest version to get these demos.
Always make sure you are viewing your pages in “Backend Editor Mode”
The Stay Theme was built on-top of Visual Composer. Here you will find a lot more info about Visual Composer and all it’s capabilities.
Visual Composer Documentation
Visual Composer Website
Along with using the default set of Visual Composer page elements Stay also contains some custom built page elements to create page content. You’ll be able to find these elements on the ‘Stay’ tab of the Visual Composer page builder popup.
General Settings, Styling, Typography, Header, Footer, Sliders, Blog, Portfolio, Sharing, Import/Export, Demo Install, WooCommerce, Mega Menu
Add your Favicon
Change 404 page details
Add custom code
Accent Colors – These will be available throughout the site to use as your accent colors.
Button Styling – Here you can set the color for all buttons on the site. Set your own font, font color and button background color.
Tags & Block quote styling can be done as well. Change color and fonts for all of these.
The default fonts and font colors can be change and customized from this tab.
We’ve included all Google fonts and you can assign one of 4 accent colors to any bit of content on the site. Accent colors can be done under “Styling”.
A lot of these fonts get used in more than one place; so make sure you check all pages after you have made your change.
Set your navigation layout to include an eyebrow above your navigation.
Logo – Add your logo to the navigation. Make sure you upload it at about double the size you want it to display, to make sure it looks nice and crisp on all retina devices.
Sticky logo – You can upload a different logo for you sticky navigation if you want. Uploading the original logo is also fine.
Mobile Logo – Upload a smaller or less detailed logo here for your mobile navigation.
Layout Options – The following can be switched on or off – Login, Cart Icon, Wish list Icon, and Search Icon
Color and font settings for the full navigation can also be set here.
Social icons can be switched on. Set the primary color and hover color and choose which icons you want to show.
Choose your layout – You can choose to include columns with dynamic data or just a thin footer with some copy write info and maybe a list of your pages.
All text and text colors can be changed here. You can also change the footer background color.
Setting up your footer column layout:
Choose footer layout 2 or 3
Choose a footer column layout. Our demo site includes 4 columns, so we chose layout 1.
Save
Adding content to your footer
Now browse to Appearance / Widgets in your WP sidebar.
You will see the four widget areas on the right hand side of this page(Called Footer Column 1 – 4)
You can now drag items from the left into the widget areas on the right.
Create simple header sliders using this section which can contain a background image and some text content, along with a link button. For more advanced sliders with more advanced customization options you can make use of Slider Revolution which comes bundled with the theme.
Set the following options:
Enable or disable sidebar
Enable or disable tags
Enable or disable author’s bio
Enable or disable social icons
Enable or disable drop cap
Here you’ll be able to choose the layout of the single portfolio page and choose the page used to display a list of your portfolio posts.
Disable or enable social icons.
Set which social sharing platforms are used and add in your Facebook API key to enable sharing through Facebook.
Export and import your theme options from one source to another.
Export a CSV of your newsletter signups.
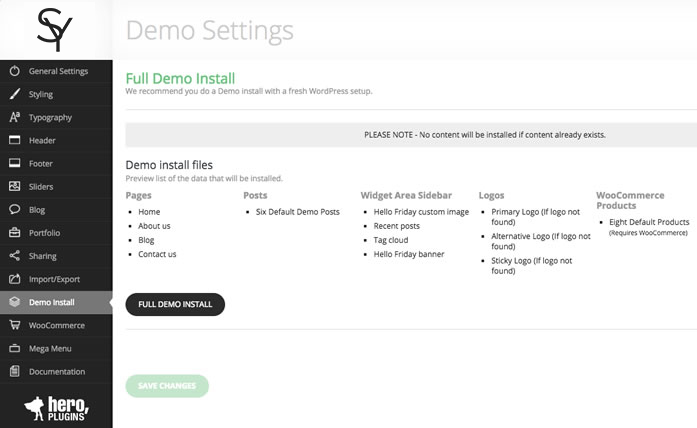
From here you’ll be able to install demo content to help you get started with a new site.
You can enable or disable a sidebar for your Shop page if needed as well as set the number of products to be displayed.
You can also enable social icons to be displayed.
Enable or disable the mega menu. Once enabled you’ll be able to create the mega menu content on the ‘Appearance > Menus’ tab.
Set font styling for the mega menu.
Add simple products and assign to category
Watch Video
Grouped products
Watch Video
How to add variable products (E.g. size and color)
Watch Video
How to add a hover image for products (Secondary product image)
Browse to Products in your WP sidebar
Open one of your products
Assign a “product image” in the right hand side of the page and then
Scroll down the page and add a “Secondary Product Image” under “Additional Image Upload”. Only one secondary image can be added.

How to assign filters and widgets to your shop sidebar
Watch Video
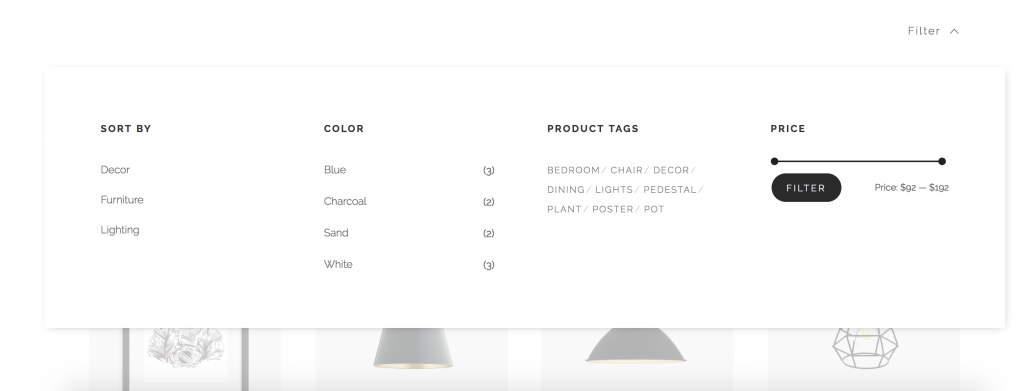
How to create the shop mega menu filter dropdown
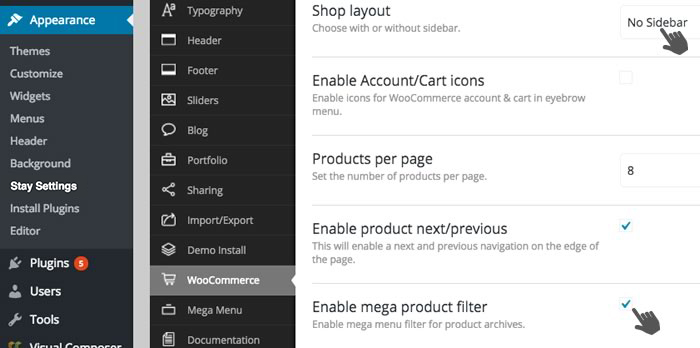
This option can be enabled on the ‘Stay Settings > WooCommerce’ tab by selecting the ‘Enable mega product filter’ option. Once this has been done you’ll be able to add in widgets to this area from the ‘Appearance > Widgets’ page by dragging and dropping the required widgets to the four available columns titled ‘WooCommerce Mega Menu Filter Column’ 1-4.
How to set my currency and country
Watch Video
PayPal
Watch Video
Coupons
Watch Video
Shipping
Part 9 – Shipping Settings Watch Video
Part 10 – Shipping Settings – Flat Rate
Part 11 – Shipping Settings – Free Shipping
Part 12 – Shipping Settings – International Flate Rate
Part 13 – Shipping Settings – Local Delivery
Part 14 – Shipping Settings – Local Pickup
Checkout Settings
Watch Video
Please view an extended list of WooCommerce video tutorials from WooThemes
Watch Video
At default all pages will have a clean white top section with the page name in the middle.
You can change this by adding a header image with custom content.
You can achieve the by doing the following:
Go to the page in your WP backend
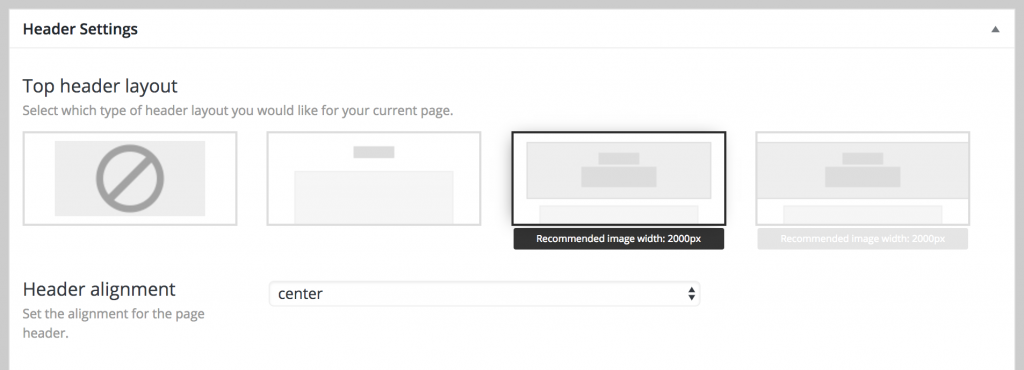
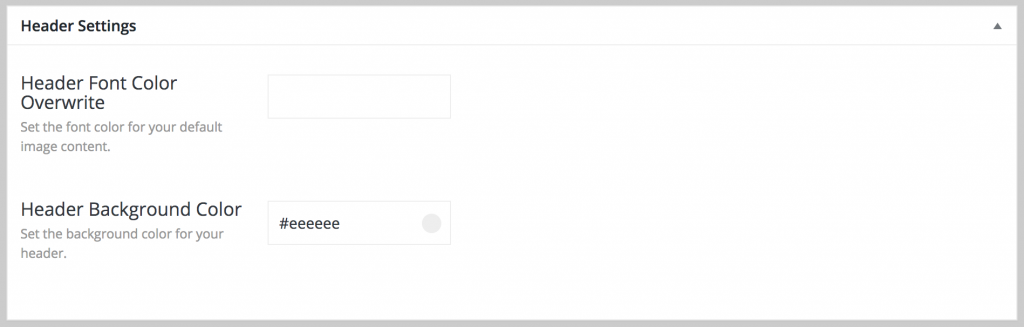
Scroll down the page to the “Header Settings” section
Here you can choose to have a background image or just a blank area
You can set the height of this area and add you own custom title and excerpt
The header will use the global H1 style. Can be set under “Typography”.
You have the ability to override the color of your global H1 color by adding a Header Font Color at the bottom of this page.
Start off by setting up a few slides
This can be done via your Stay settings panel
This can be found here – Appearance / Stay Settings / Sliders
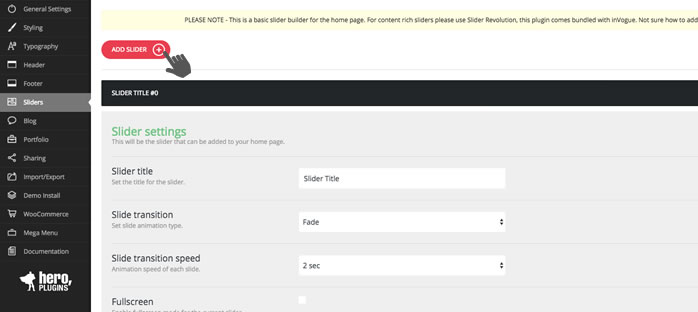
Add a few slides and edit each by adding your own images and/or text
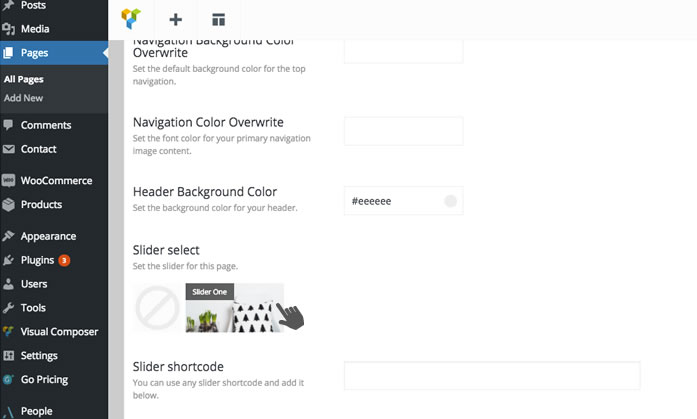
Once happy with your slides, save and go to the page where you want to add the slider
Scroll right to the bottom of your page editor and select the slider that you have created
Save the page and go to the frontend to preview.
We are using an Extended License for Visual Composer that is bundled within Stay, so there’s no need to update it form your side. We will make sure that we update Visual Composer to the latest version with every big theme update that gets pushed out. You can then simply update your theme and Visual Composer will also be updated.
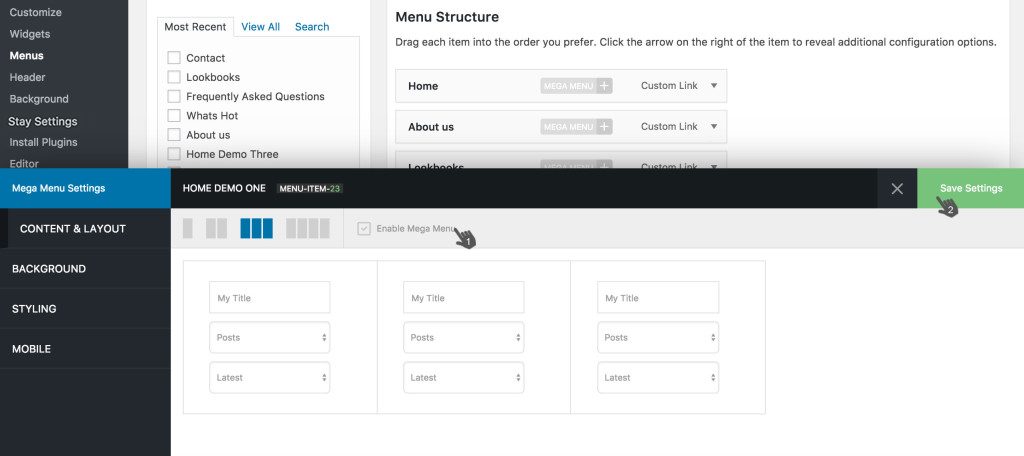
You can enable this option by navigating to the ‘Appearance > Stay Settings > Mega Menu’ tab and ticking the ‘Enable mega menu’ checkbox.

Once the option has been enabled and saved you can then move on to the ‘Appearance > Menus’ page to create and edit your mega menus. From here you can select the menu you’d like to edit and begin editing and adding content to a mega menu for each link.

When clicking the ‘mega menu’ button on each link you’ll be provided with a new menu providing the options to add content to this mega menu. Here you’ll be able to define the number of columns for the dropdown and the content for each column as well as the styling options for the mega menu. You can then enable this menu, or later disable it if necessary to prevent it from displaying, and then save your settings.
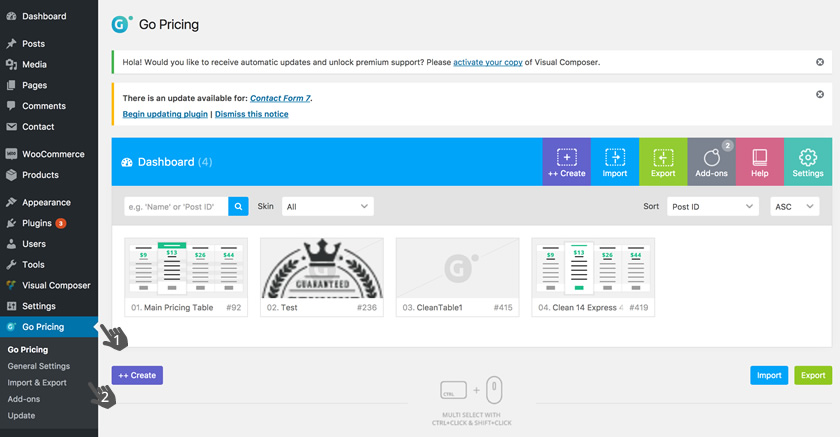
Start off by browsing to the Go Pricing Plugin in your WP sidebar.
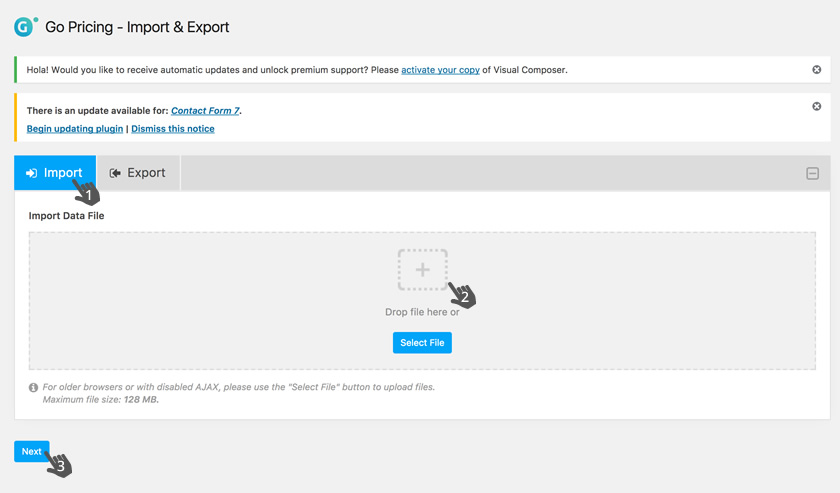
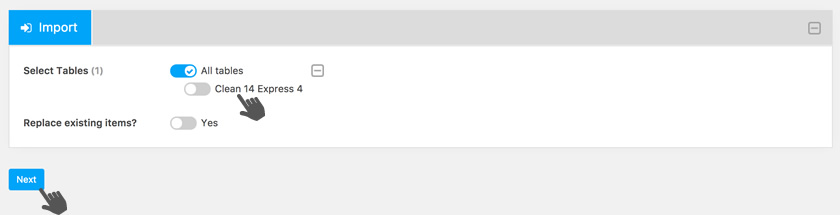
We have one pre-designed pricing table that you can now import.
Our example can be downloaded here. Make sure to unzip the file and import the txt file into GoPricing.
Many more free examples to download from Go Pricing.
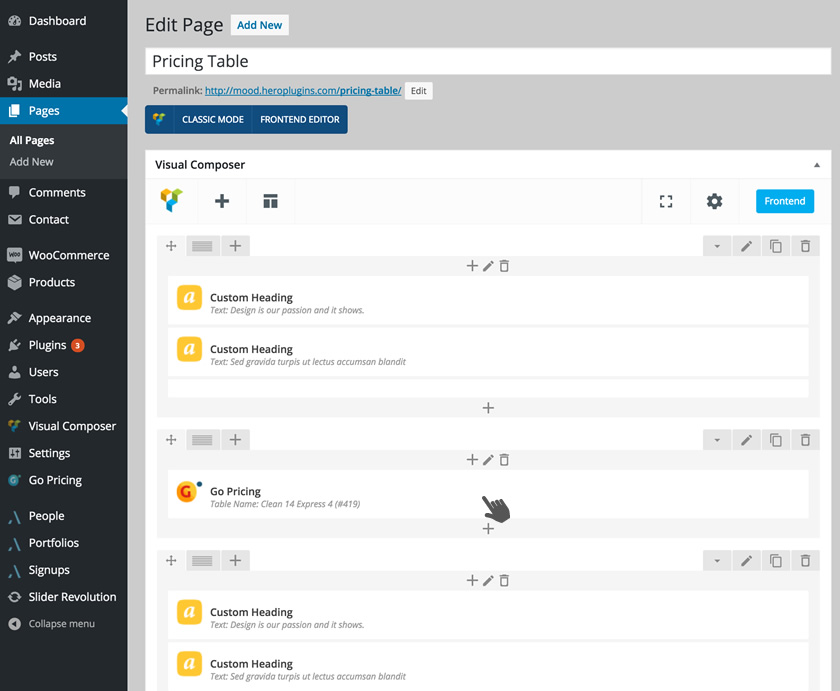
Once your import is done, please go to the Go Pricing Dashboard. You will now see the newly added file. You can now edit your pricing table by clicking on the pencil as shown below.
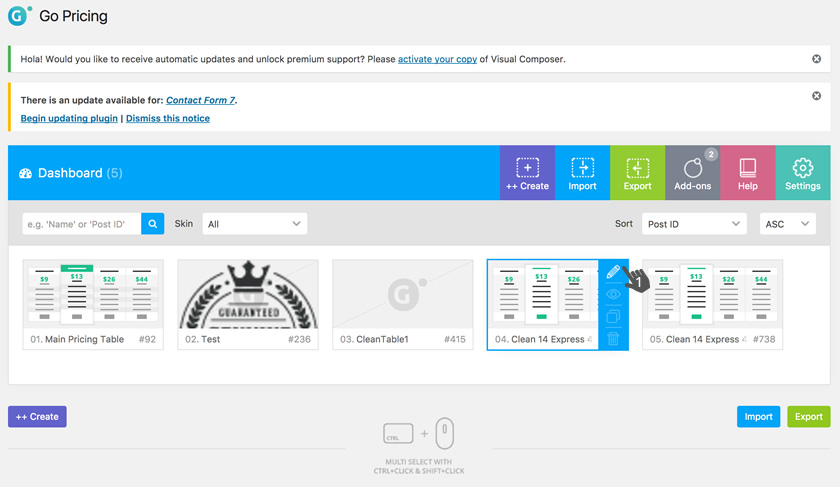
Once you are done editing the pricing table, save your settings and go to a page where you want to add the table. On this page, click on the Add button as shown below.
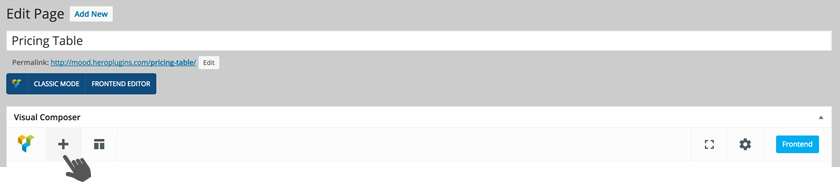
You can now add the Go Pricing element to your page by selecting it from the Visual Composer popup.
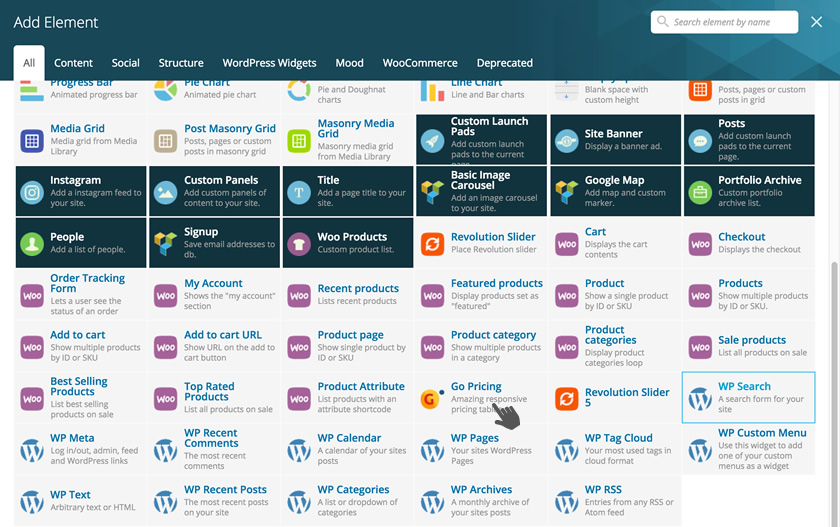
You will be presented with a second popup and you can now select your Pricing Table from the dropdown list and Save Changes.
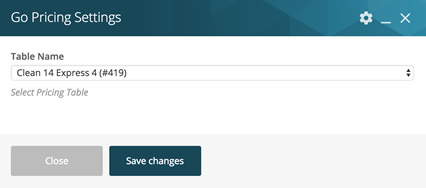
The Pricing Table is now active in your page. Save the page and go view the frontend.
Please go to the Go Pricing website for in-depth documentation.
Slider Revolution is a very powerful slider plugin with many features.
To learn more about the plugin and use it to its full potential, please have a look at the documentation given by the plugin author.
https://www.themepunch.com/revslider-doc/slider-revolution-documentation/
Adding a Slider to a page.
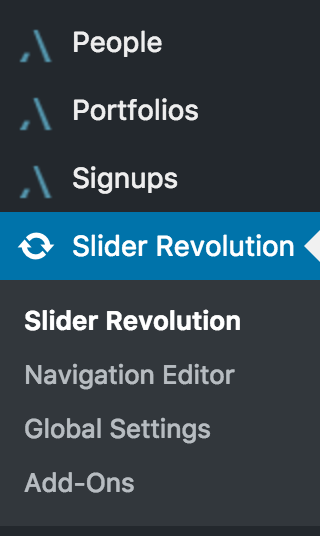
Open the Revolution Slider plugin that came bundled with Stay. This can be found in the WordPress sidebar.
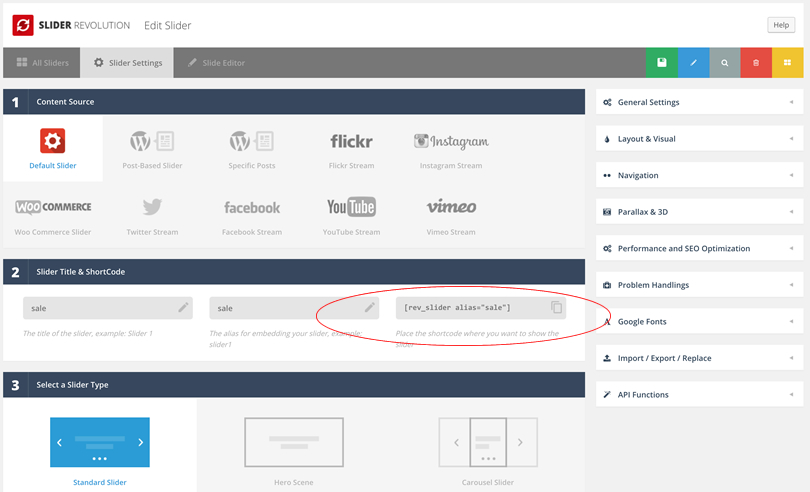
Create your slider and copy the short-code.
Now go to your page backend and scroll down to the ‘Header Settings’ section. From here you’ll need to select either the 3rd or 4th layout option which both support a header slider.
You can then scroll down to the bottom of this section and add in the slider shortcode to the ‘Slider shortcode’ field.

Remember to Save/Update your page.
Portfolio posts can be created from the ‘Portfolio’ page accessed from the WordPress admin menu. From here you’ll be able to create new Portfolio posts as well as create categories for your portfolio posts.
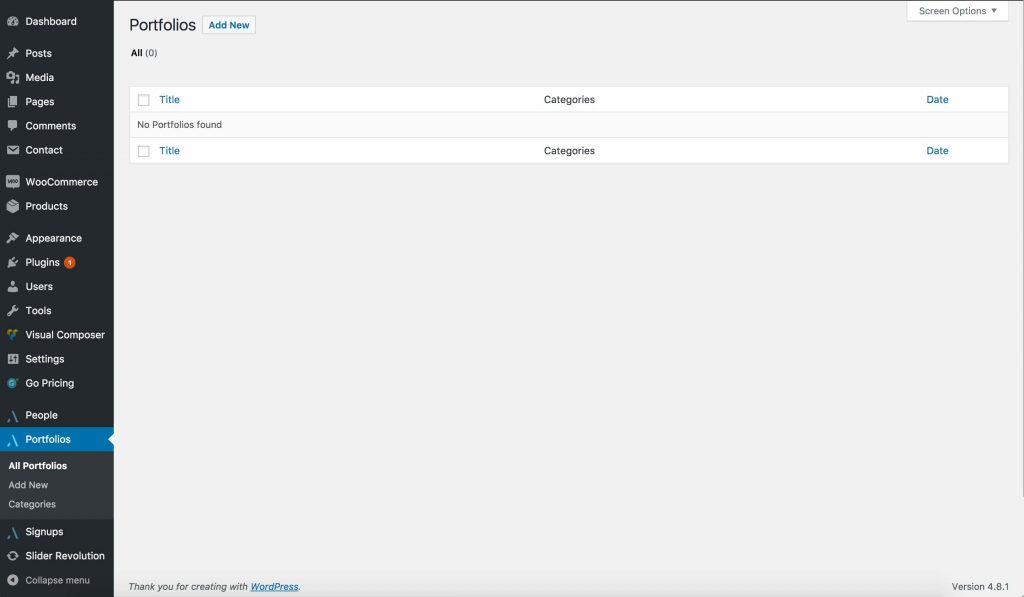
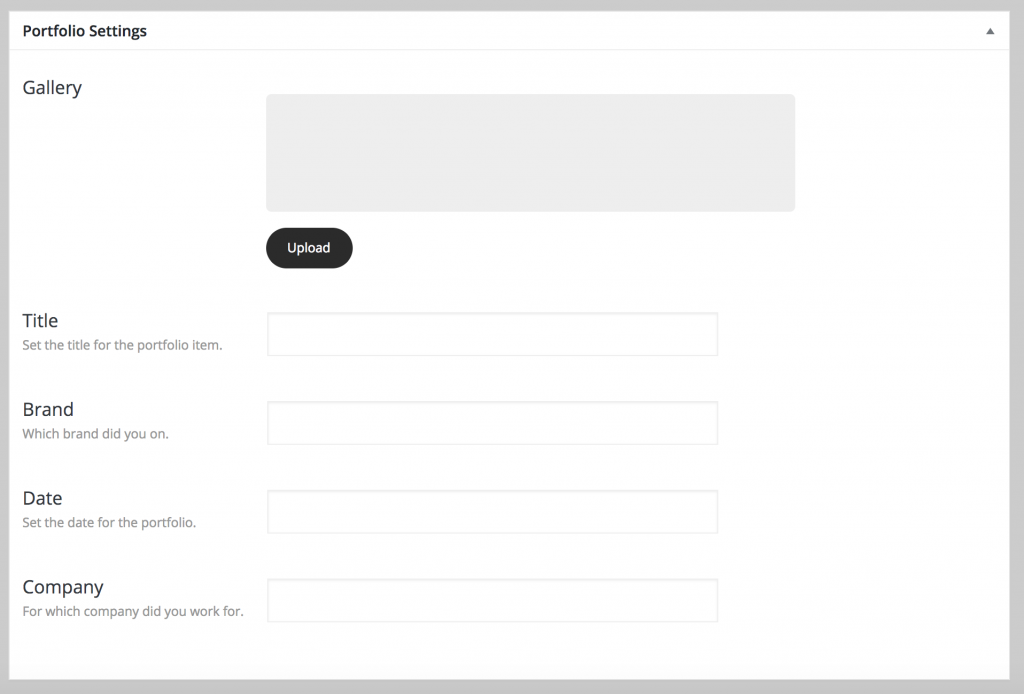
When creating a new Portfolio posts you’ll be able to edit the post content, gallery images, featured image, assign a category and set the header options.
Once you’ve created your Portfolio posts you can then add these to a page by using the ‘Portfolio Archive’ element from the page editor.
With this you’ll be able to either display specific Portfolio posts by selecting the option from the ‘What to display’ dropdown.
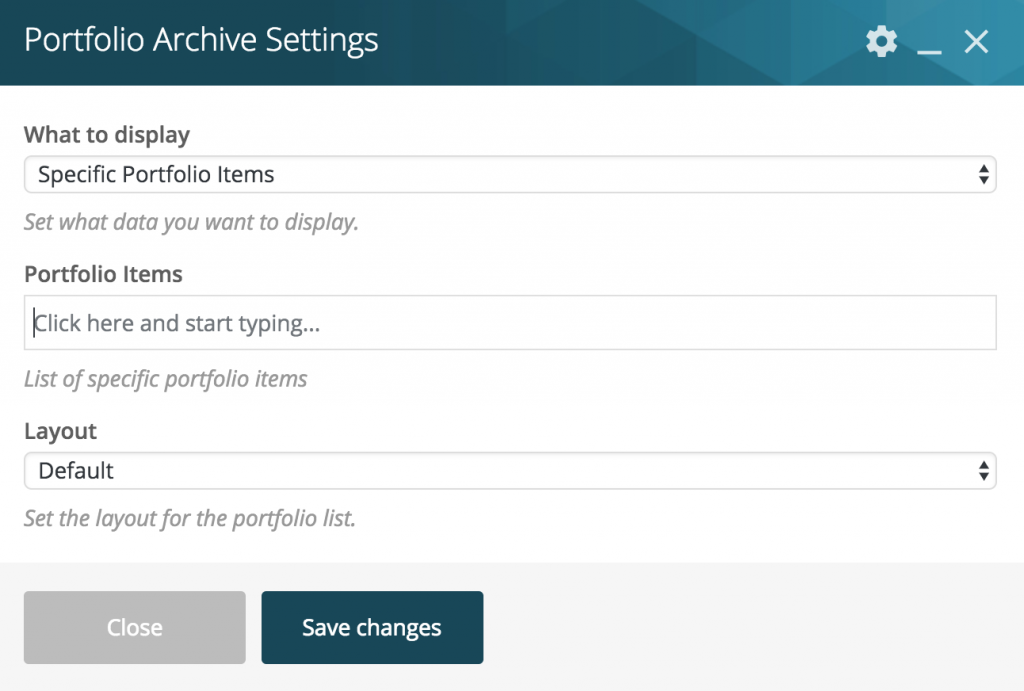
Or choose to display posts from an entire category.

As well as set the layout style.

An example of the Portfolio element can be seen on our demo page at the below link.
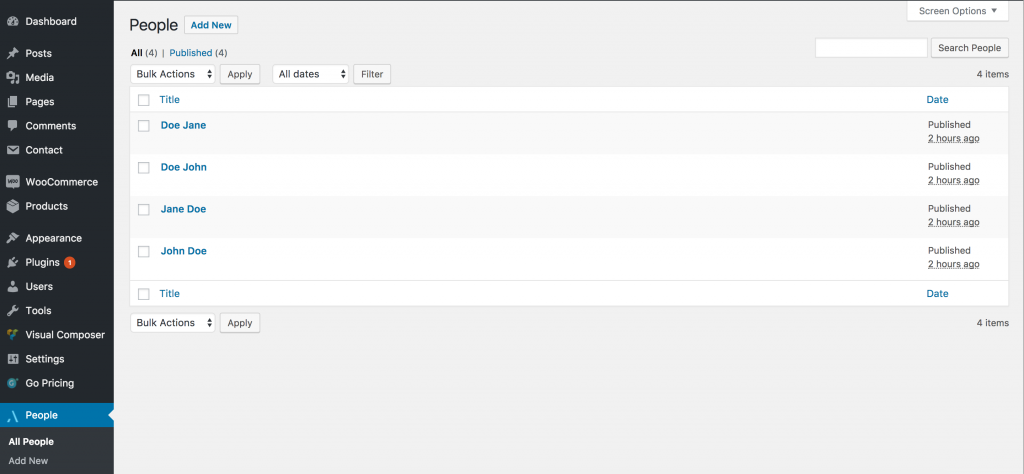
People posts can be created from the ‘People’ page accessed from the WordPress admin menu.
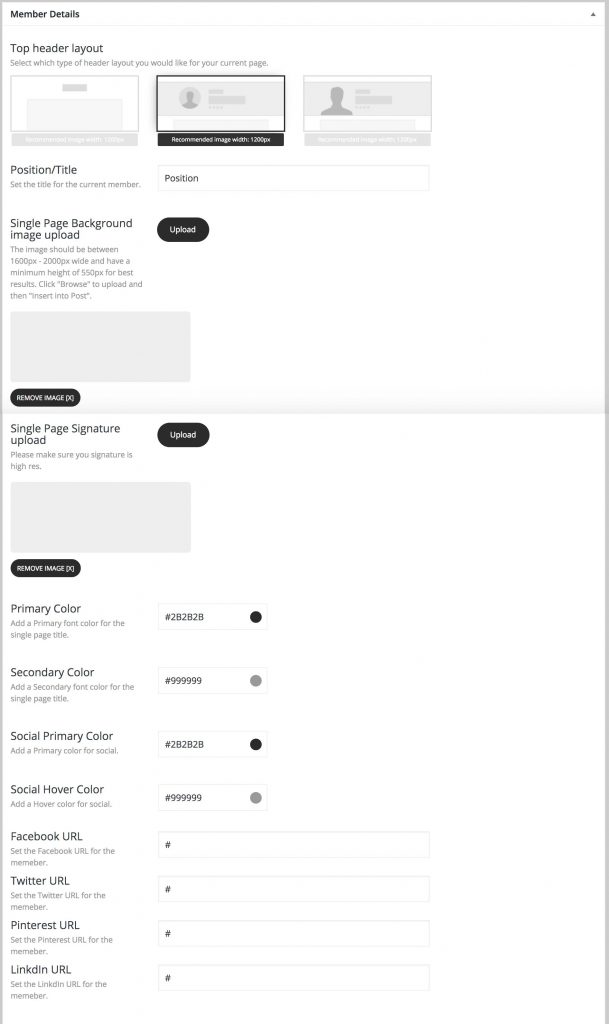
When adding in a new posts or editing and existing post you’ll be able to set the content for the post as well as adjust the ‘Member Details’. The ‘Member Details’ section will allow you to set specific styling for the post by uploading a header image and adjusting the layout options as well as setting the font color options. You can also set the social media links for the members social media accounts.
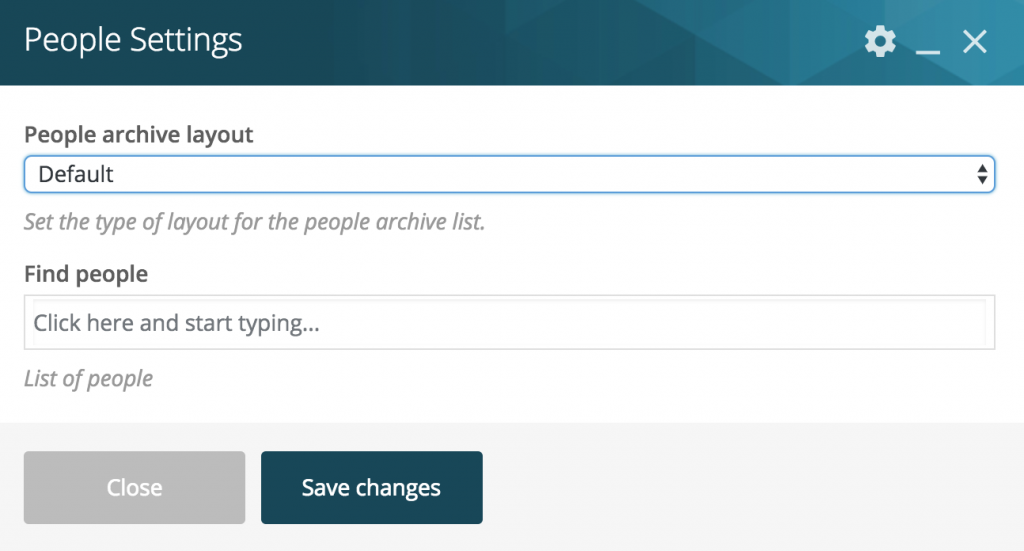
Posts created from the ‘People’ post type can then be added to a page by using the ‘People’ element from the Visual Composer page editor.

The settings for this element will let you choose a layout option and also choose which specific ‘People’ posts should be shown.
An example of this element can be seen on our demo page at the below link.
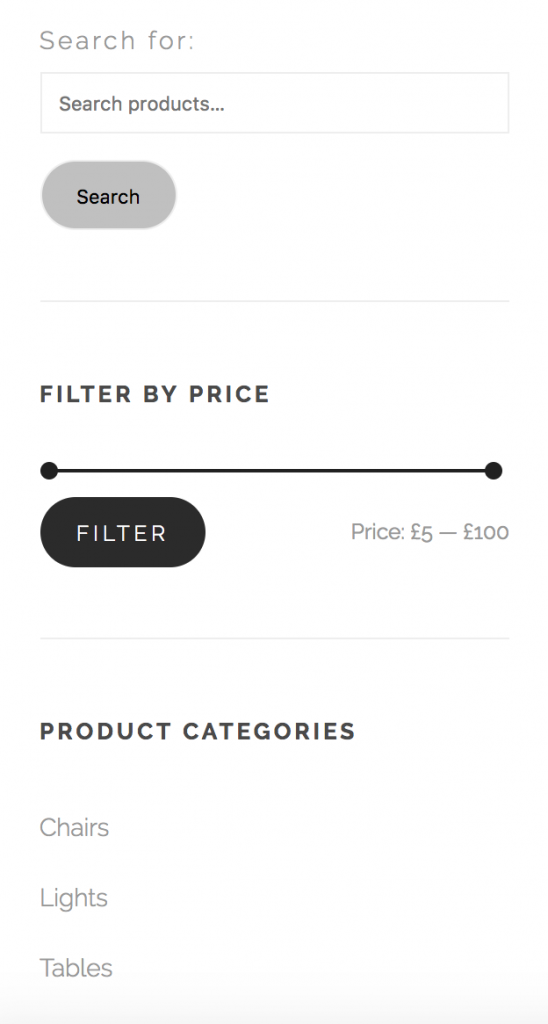
First you need to switch on the Mega Menu filter by doing the following.
Browse to Appearance / Stay Settings / WooCommerce / Enable Mega Product Filter. Switch on the Mega Menu.
Also switch the page layout to One Column only. E.g. No sidebar.
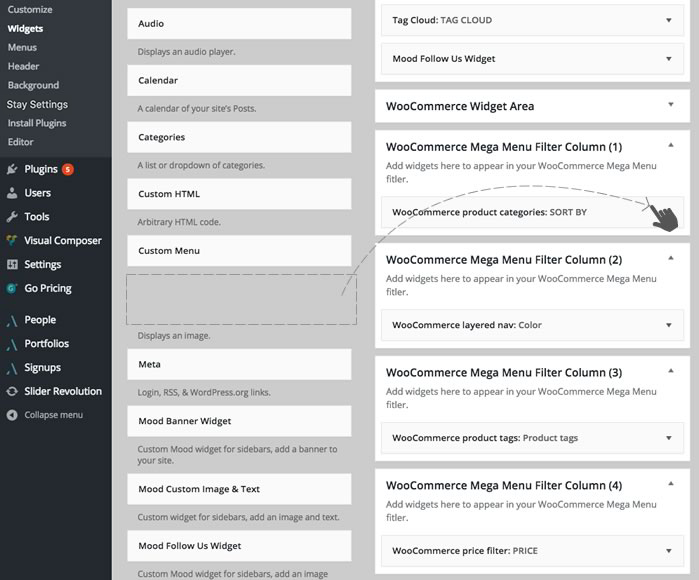
Browse to Appearance / Widgets. Here you can drag.
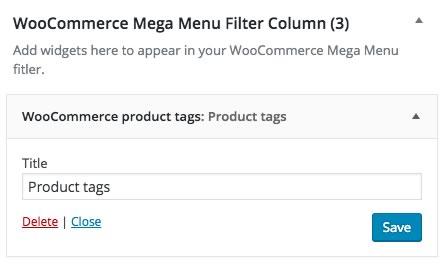
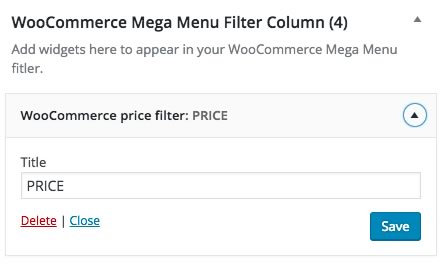
Now drag the following widgets from the left into one of the WooCommerce Mega Menu Filter Columns on the right.
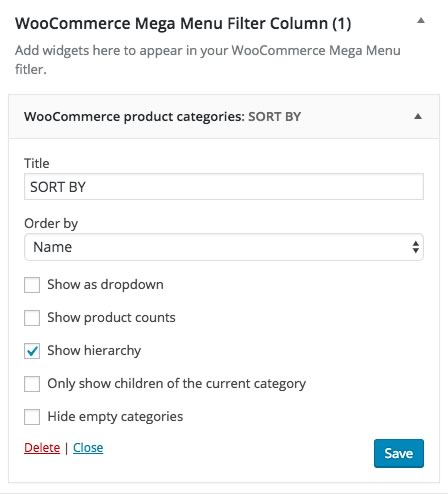
WooCommerce Product Categories
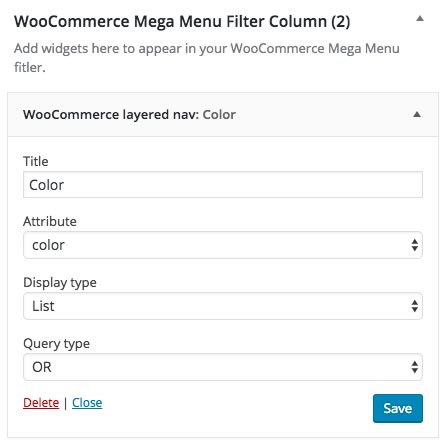
WooCommerce Layered Nav
WooCommerce Product Tags
WooCommerce Price Filter
Below you will see examples of the content that is currently displayed on our demo site.
Now go to your Shop page and you will see the filter is active.
NOTE: It's that festive time of year again and we will be taking a short break to recharge from the 16th of December 2020 until the 3rd of January 2021. During this time our support will be limited but we will try to respond to high priority tickets as best we can. Have a great holiday!
OUR HEROES WILL BE HANGING UP THEIR CAPES FOR A SHORT BREAK!
We'll be out of office from the 2nd of August until the 18th of August 2019. Please note that during this time we will not be available to assist with support queries but will be right back to assist from Monday the 19th of August 2019. We appreciate your patience and support!
While we will always do our best to get back to you within an hour or two, we ask that you please allow for a maximum of 24 hours for feedback.
Monday to Friday, 9am to 5pm in the UTC+2 Timezone.
Bug fixing
How to questions
Assistance with integration
Support for 3rd party plugins
Custom Coding
Theme customization
Stay informed about all new releases and product updates