Once you have installed the latest version of WordPress (wordpress.org), then you can start with the theme install.
For 1st time WordPress users, please have a look at the install guide from WordPress. http://codex.wordpress.org/Installing_WordPress
Download the theme from your ThemeForest Downloads page. You will download an installable zip file.
Please don’t unzip this file, as you will need to upload it to your WordPress installation as is.
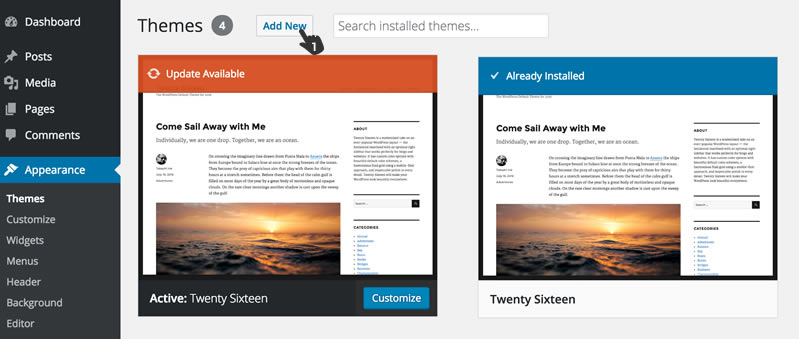
Open your WordPress backend and browse to “Appearance” in the side navigation.
Click on “Themes”. On this page you will find an “Add New” button at the top. Click it and go to the “Add Themes” page. Here you will find an “Upload Theme” button. Click it and upload your zip file.
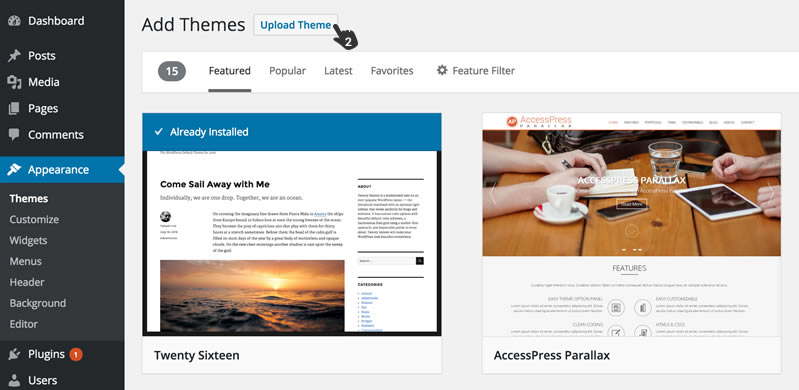
You will now see an “Install Now” button, which you can now click to install. This process will take a few seconds.
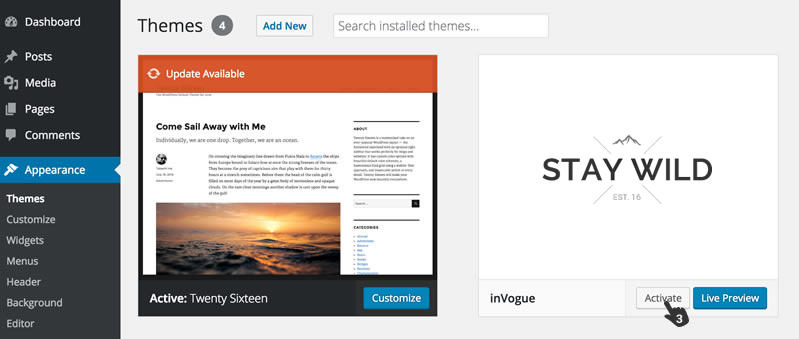
After successfully uploading of the theme, you will now see the theme displayed with the other standard themes and you can now activate Stay Wild by clicking on the “Activate” Button.
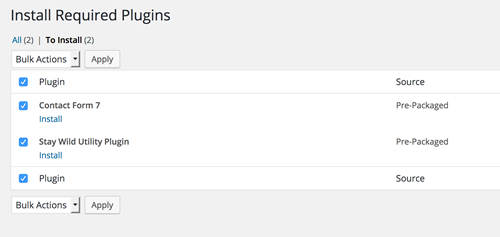
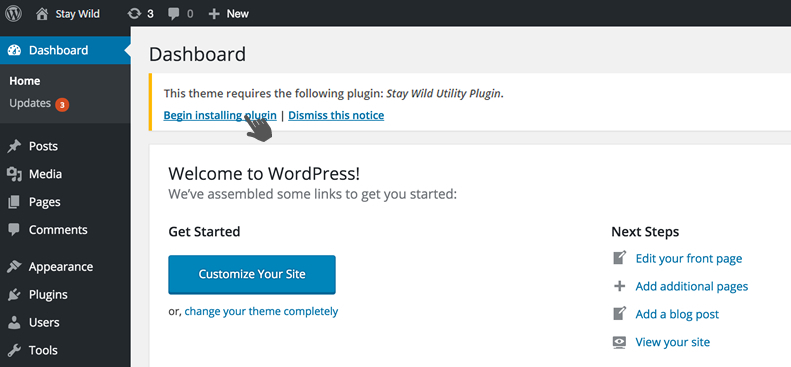
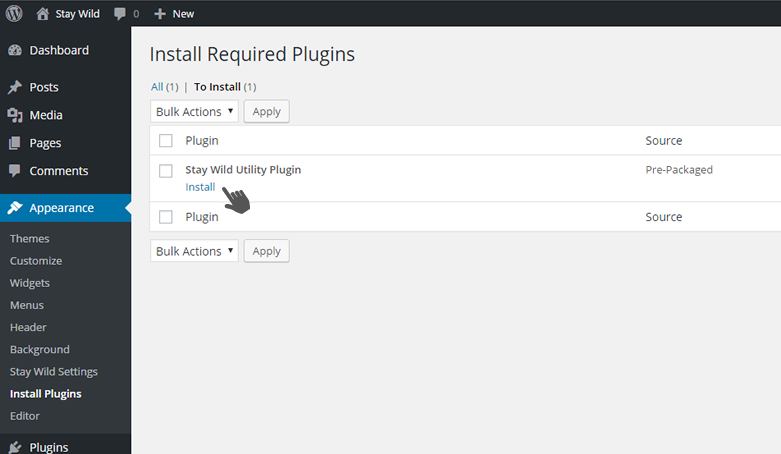
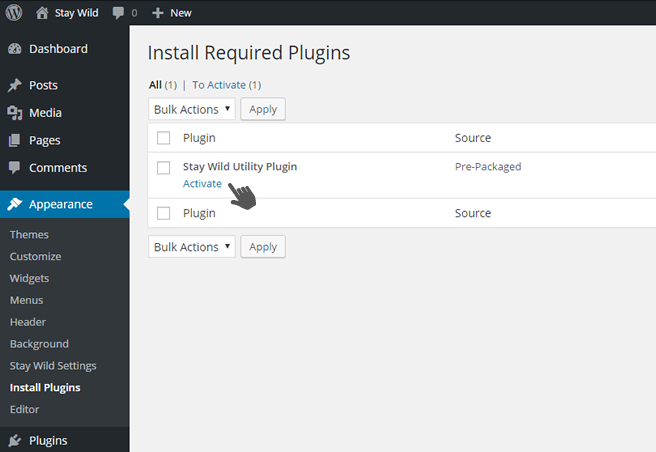
After you have activated the theme, you will be presented with a notification at the top of the screen that suggest you install the plugin required for the theme to function properly. First install the plugin and then once it is installed, please activate it. Stay Wild Utility Plugin and Contact Form 7 must be installed.
Lets start off by setting up a few pages.
Browse to “Pages” in your WP side bar.
Add new page.
Create the pages needed for your website. Home, Contact, About etc.
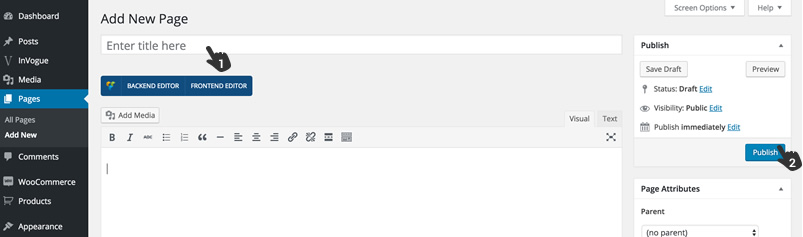
Create a page by adding a page and then press “Publish” in your right hand side bar.
Browse to Appearance / Menus in your WP sidebar
Create a main menu for your site by typing the main menu name and then clicking “Create Menu”
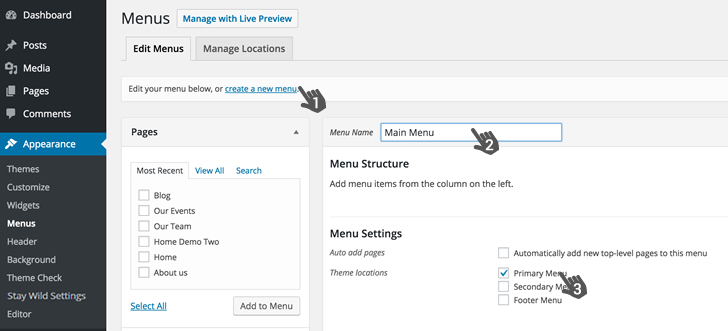
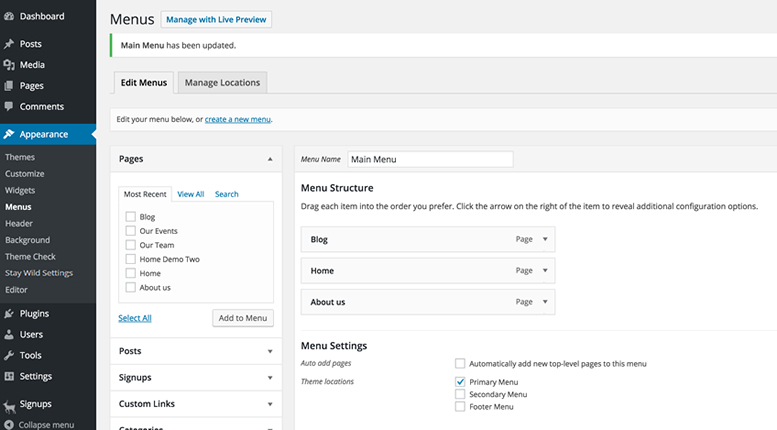
You will see a list of pages on the left.
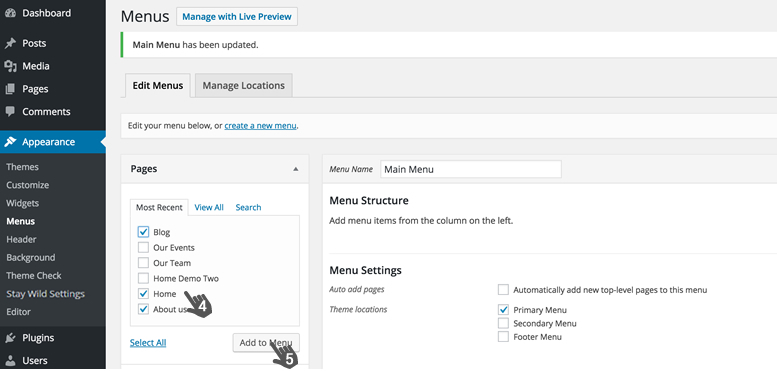
Select the ones that you want to display in your main menu and click “Add to Menu”
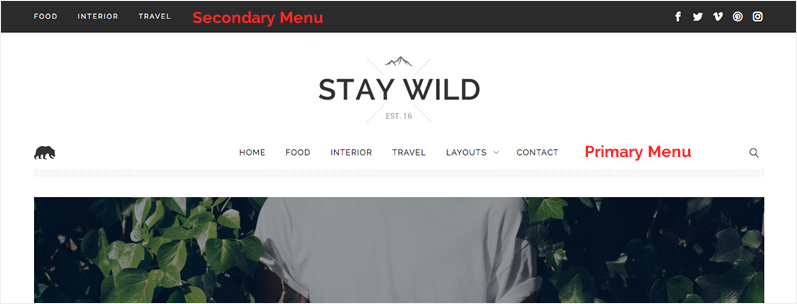
Also make sure that you assign the menu to the right area of the site by going to “Manage Locations” or setting it to Primary Menu as shown below.

Here we show you which is the Main Menu and the Secondary Menu
You can create the secondary and footer menu in exactly the same way as above.
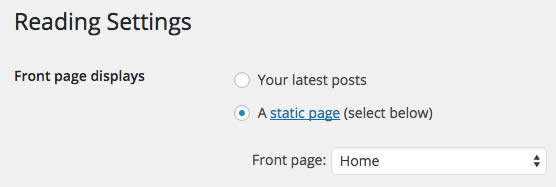
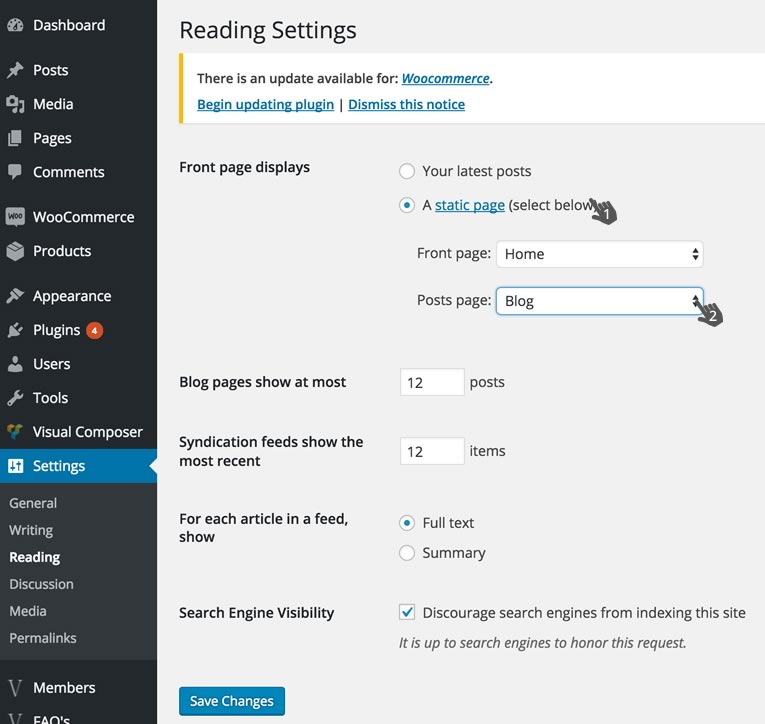
Browse to “Settings / Reading” and click Static Page and then click on the “Front Page” dropdown and select your Home page and Save.
If you are not running your blog on the home page and need to assign the blog to another page like “Blog”, then you need to point your blog to that page.
Browse to “Settings / Reading” and click Static Page and then click on the “Post Page” dropdown and select your Post page and Save.
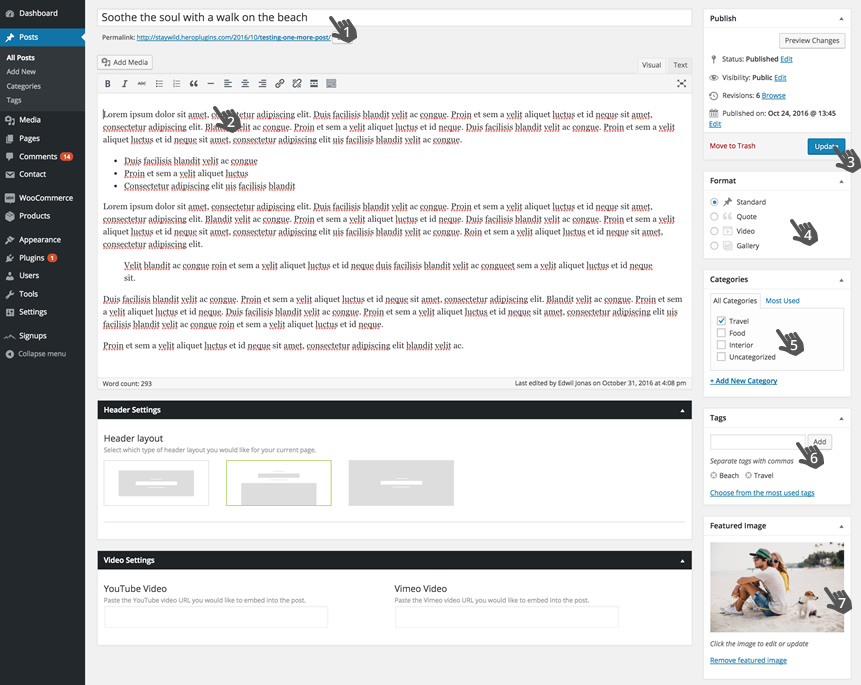
Browse to your WP sidebar and click on Posts / Add New
1. Give your post a title
2. Write content
3. Update/Publish
4. Format – Standard would be the default
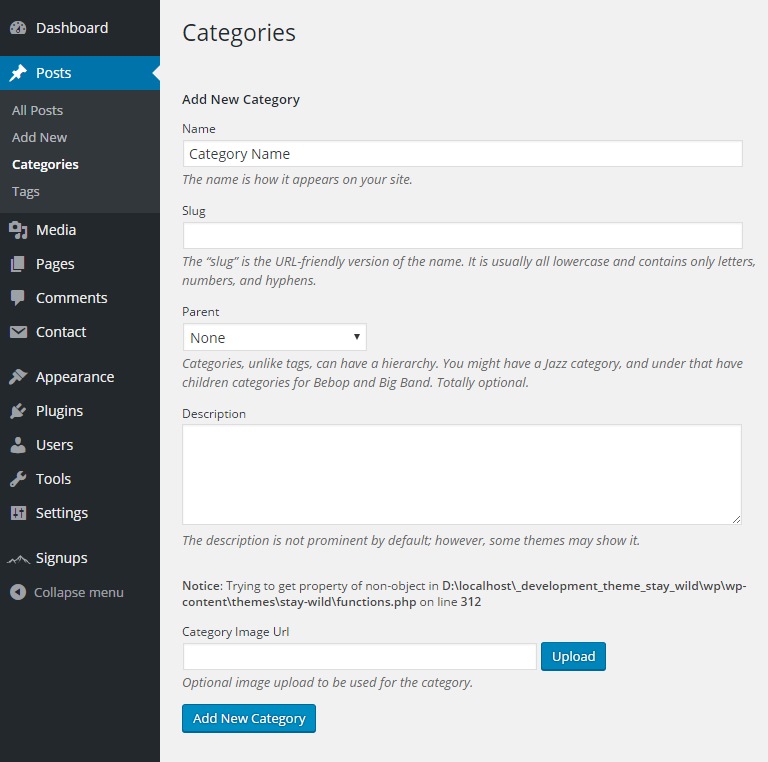
5. Create new categories
6. Add tags to posts
7. And add a featured image
– Hit Publish/Update
The Header layout can also be set on this page. Under “Header Settings” You can now set if you want the featured image for the post to be full screen, contained with heading above image or contained with heading on the image.
Your post will now be visible on your site frontend
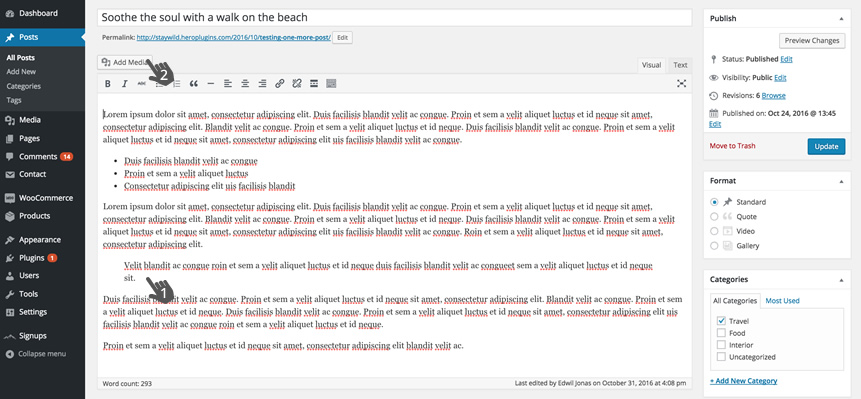
If you want to add an image in the content area, then first click in the area where you want the image to be displayed and then click on the Add Media button.
Note: Please make sure that your images are optimized. Uploading very large images will slow down the page load.
Please make sure that all plugins that comes with the theme are installed and activated.
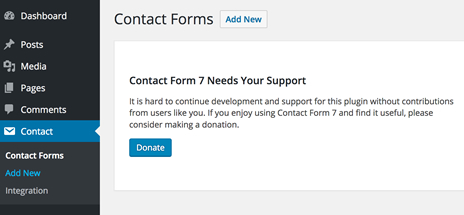
Start off by setting up your first form by browsing to Contact in the WP sidebar
Click on “Add New” and give your form a name.
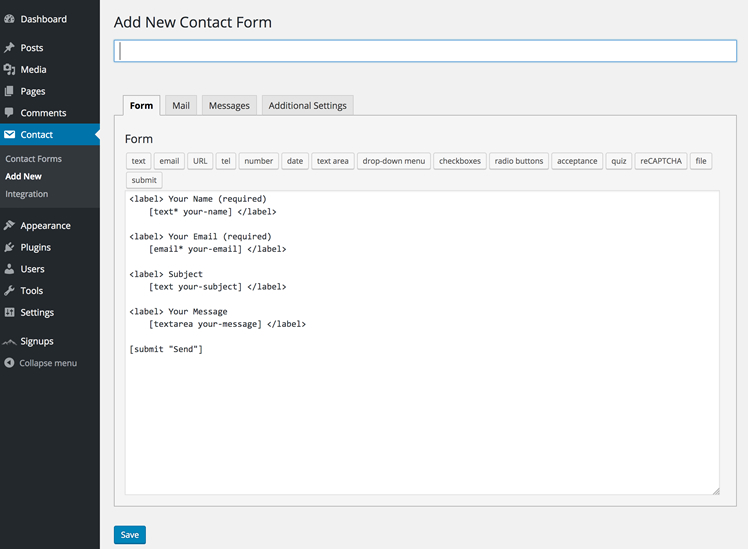
Once you are happy with the form, save it and go back to the Contact Dashboard.
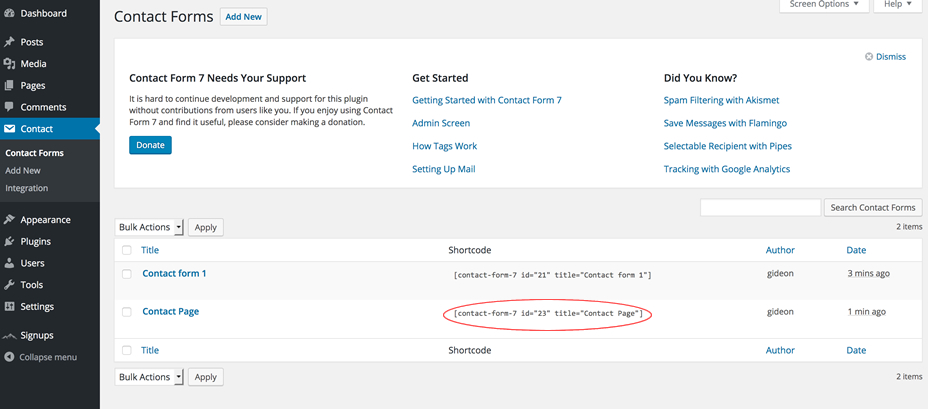
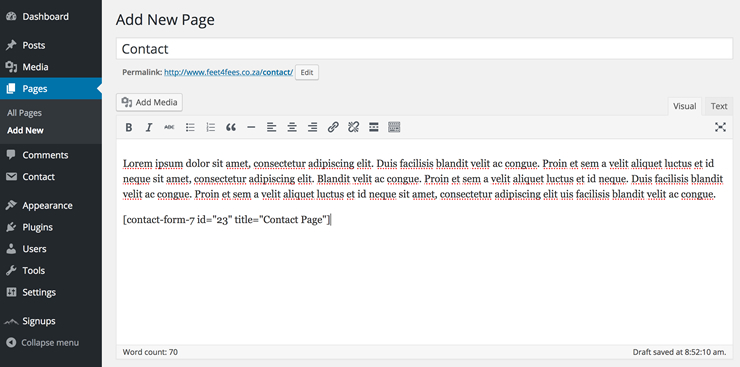
Copy the shortcode for the form and then go to your contact page and paste the shortcode into the page content area. You can now open your contact page frontend to see the result
Please visit Contact Form 7 website for an in-depth documentation.
Browse to Appearance / Stay Wild Settings
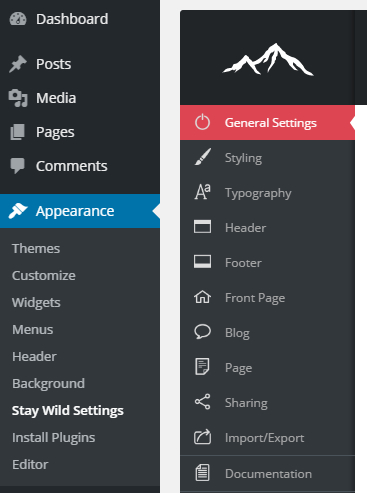
Here you’ll find a few basic things to start off with
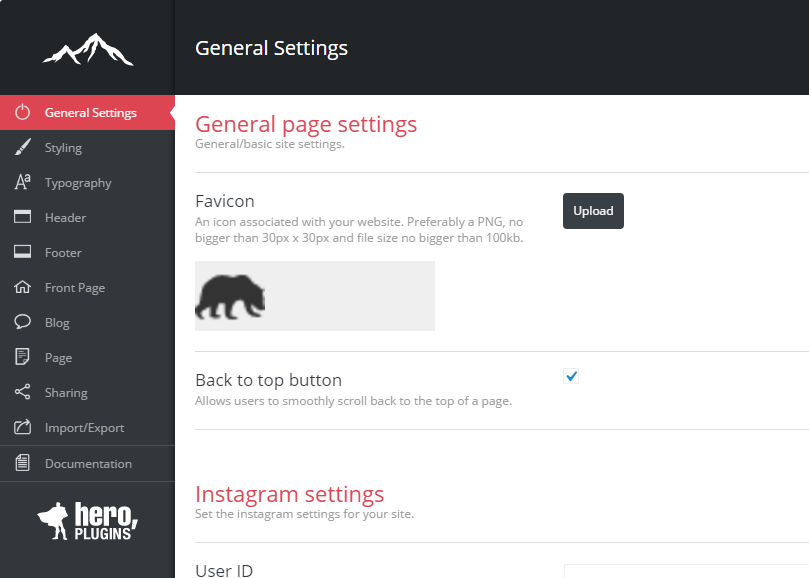
Add your Favicon. Upload a transparent PNG for the best result
Instagram Settings
If you want to add an Instagram Widget in your sidebar or activate the Instagram full width footer, then you can start off by adding your details here
User ID
Where do I find this? https://www.otzberg.net/iguserid/
or
Access Token
Where do I find this? https://elfsight.com/blog/2016/05/how-to-get-instagram-access-token/
or
https://jelled.com/instagram/access-token
404 Page Details
This is the content that will show up if a page can not be found
You can set up 4 accent colors for the use through your site. These are mostly used in the Typography section of the settings.
You can also set the colors and styles for Social Icons, Buttons, Tags and Block Quotes here
All fonts for the site can be set here. This includes, sizes, colors, weight etc. All Google Fonts included. The default font settings should be sufficient for a great looking site.
Here you can upload your site Logo and Sticky Navigation logos. Make sure that they are transparent PNGs at about 150px in height for the best result.
Primary Navigation
Here you can set the font, font color and background color.
Dropdown Navigation
Here you can set the font, font color and background color.
Social Icons
Switch this on and your social icon will be included in your navigation bar.
Select Social Icons
Switch on the social icons that’s needed and add a URL and set the hover color for each
We recommend you keep footer layout one that is selected by default.
Set the colors for the footer and add some Copyright Info. You can also enable the Instagram feed and social icons in this section.
Extra Signup Settings
Switch this on and a Newsletter Signup bar will be added to the footer area. This can be styled by background color or background image.
Top Layout
Here you can choose between a straight forward layout or add a Full Width Slider or Contained Slider.
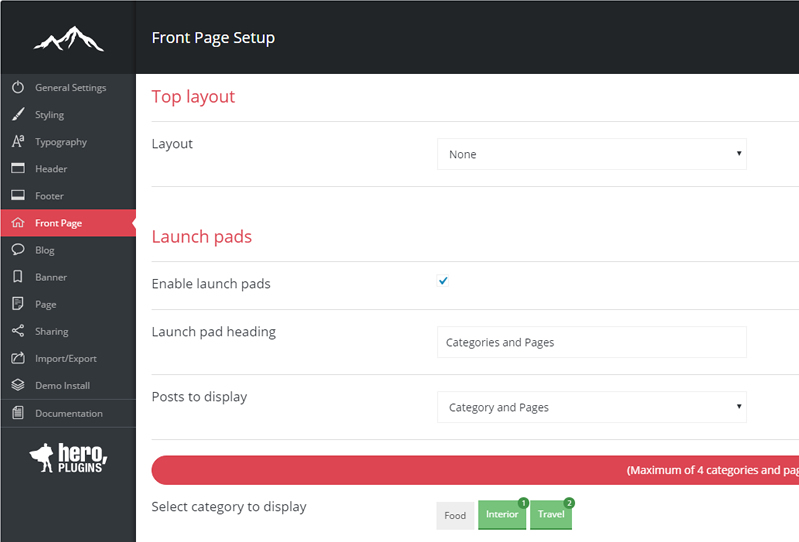
Launch Pads
If you want launchpads to be displayed under your main logo or main slider, then you can switch this on and give it a heading.
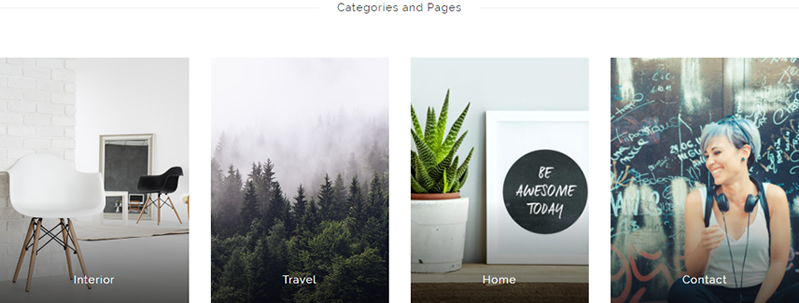
You can choose to display latest posts or categories and pages
Front Page Blog Layout
You can choose to display latest posts or show categories with latest posts and the related posts after each.
Front Page Sidebar
You can switch on a sidebar on your home page
Blog List
If you have a separate blog list page, then you can switch on or off your sidebar.
Blog Single Post Page
Switch on or off the sidebar
Show / Hide Tags
Show / Hide Author’s Bio
Enable Social
Show / Hide Social Icons on posts
Setting up the social icons to show up can be done under the HelloFriday Sharing Tab
Here you can switch on the sidebar for pages and activate social icons
Select the social icons you want displayed on posts and pages.
Please note that you still need to switch then on under the blog or page tab above
This can be used to import style settings from one install to another. Say for instance you work on a dev server and there’s some changes and want to now include them on your live site, then you can do the following.
Click on “Generate Export Options”, copy everything from the box.
Go to your new/live site and paste this into the import box and click on “Import Options”
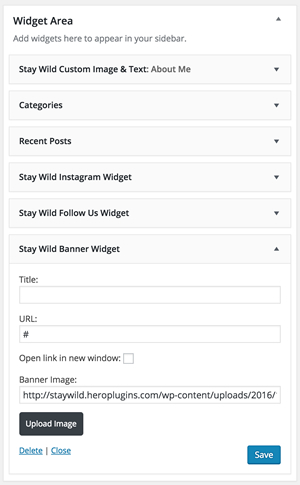
Browse to your WP sidebar. Go to Appearance / Widgets.
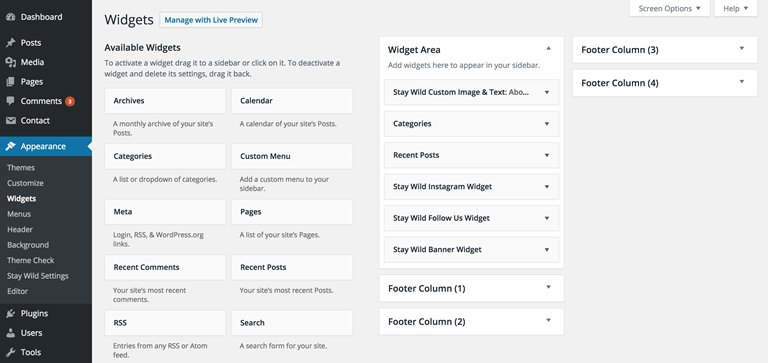
You will see a Widget Area on the right hand side.
You can now drag items from the left, under Available Widgets, into the Widget Area box.
The image above shows the layout for our current demo site.
Add the widgets needed for your site and edit each one of them by giving it a title etc.
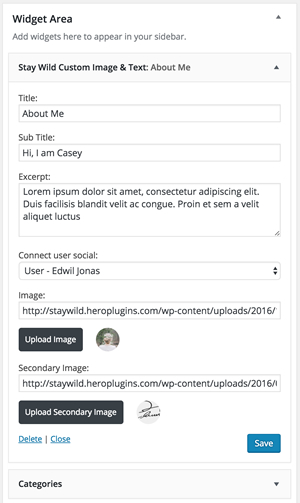
Start off by dragging the “Stay Wild Image & Text” widget into the Widget Area box.
Click on the down arrow and start editing.
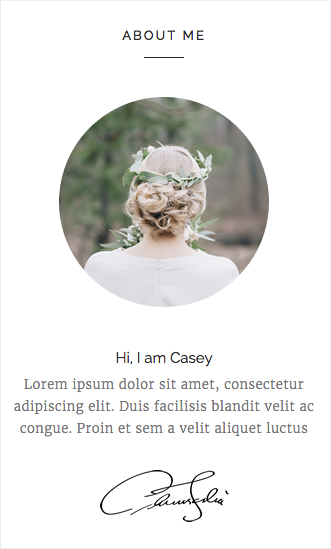
Here’s an example of our demo site widget.
Hit Save and go view your live site.
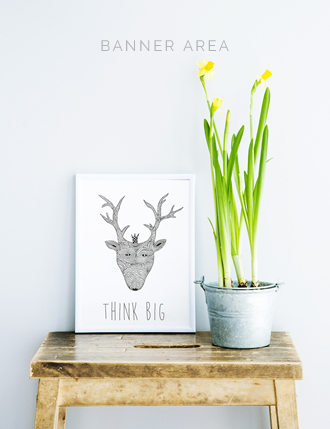
The Stay Wild Banner Widget must also be added to the Widget Area box.
Open the Banner Widget and the content needed.
Make sure that you upload a banner of 330px in width.
The one on our demo site is 330px x 429px.
Hit Save when you’re done and go preview your site frontend.
To enable the launch pads on the front page, follow the directions below.
Browse to Stay-Wild Setting panel within the WordPress back end.
Always make sure that your home page is set to Home in WordPress.
Assign the right Home page as Home
In your WordPress backend, browse to “Settings / Reading” and click Static Page and then click on the “Front Page” dropdown and select your Home page and Save.
The posts slider requires more than one published post to be available in order to create the slider.
Please ensure that you have at least 2 published posts available in order for the slider to function correctly.
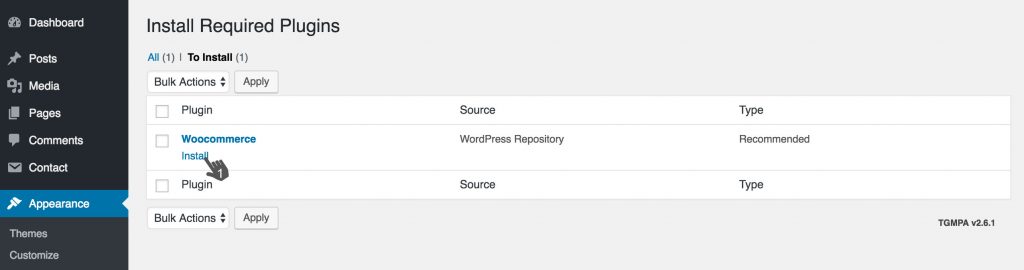
With version 1.3.6 of Stay Wild, WooCommerce is supported and you’ll be able to install the plugin to run your store!
With this version of the theme you’ll be prompted to run the WooCommerce installation through the plugin installer.
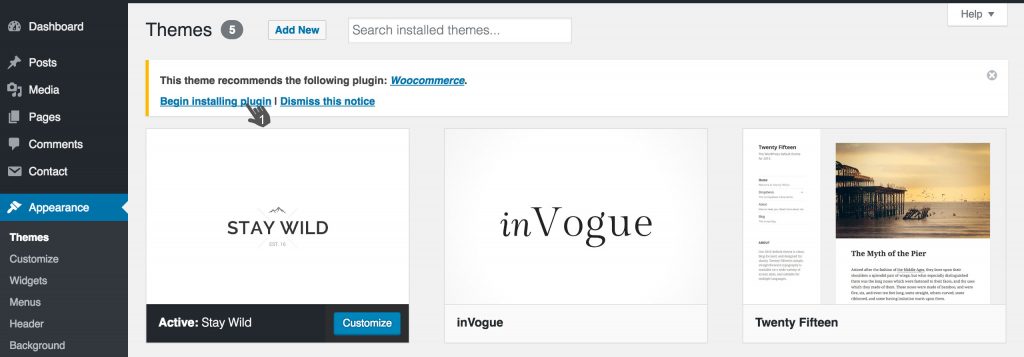
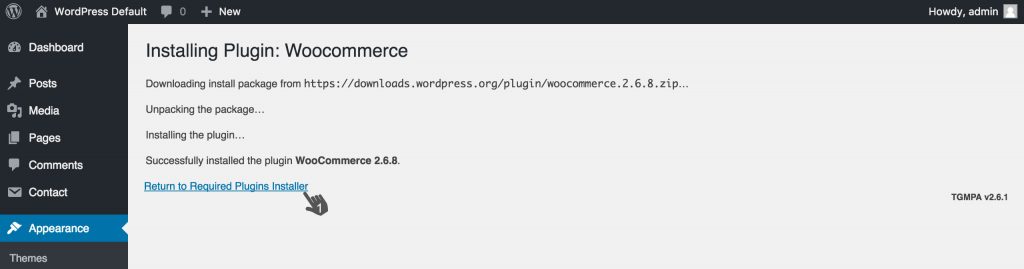
Once the installation has completed and you have returned to the plugins installer screen, WooCommerce can be activated.
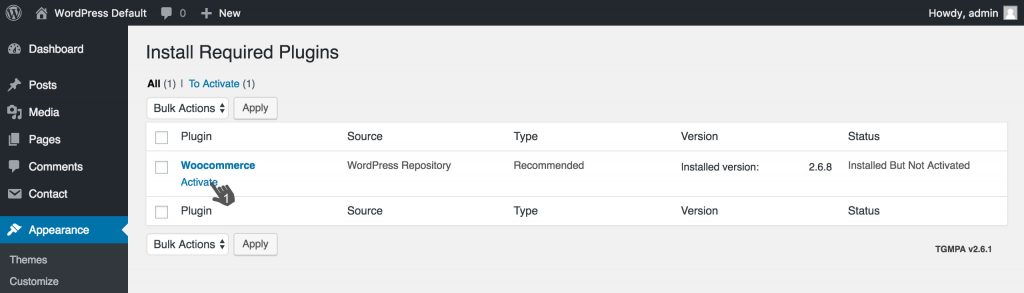
Once the plugin is activated you can return to the ‘Themes’ page and will receive a prompt to run through the WooCommerce setup wizard.
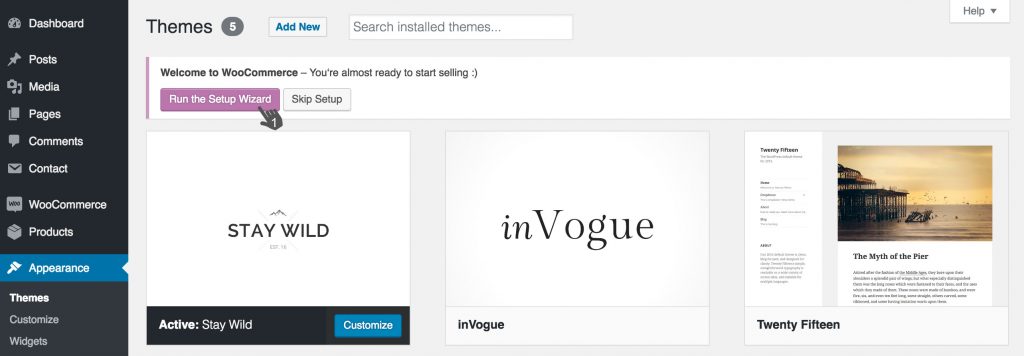
For more detail on how to get started with WooCommerce and setting up your products and store, more info can be found on the WooCommerce documentation page here.
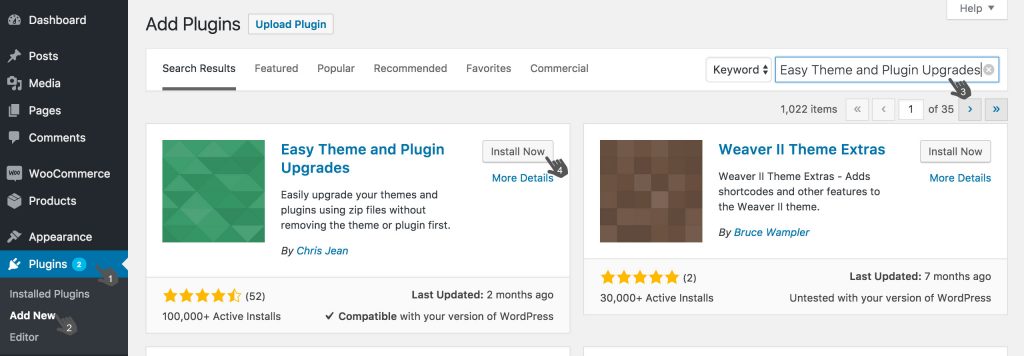
We recommend to always run theme updates through the WordPress admin area rather than uploading the theme files manually. Uploading the files manually could cause inconsistencies between the theme options saved within the database and the new theme files.
You will first need to install the ‘Easy Theme and Plugin Upgrades’ plugin, the plugin is available from the WordPress plugins repository and can be found here. This plugin can be installed directly from within WordPress on the ‘Plugins > Add New’ page.
You will then need the latest version of the theme files which will be available on Theme Forest. Once you’ve downloaded the theme files you can use the ‘stay-wild.zip’ for the update process.
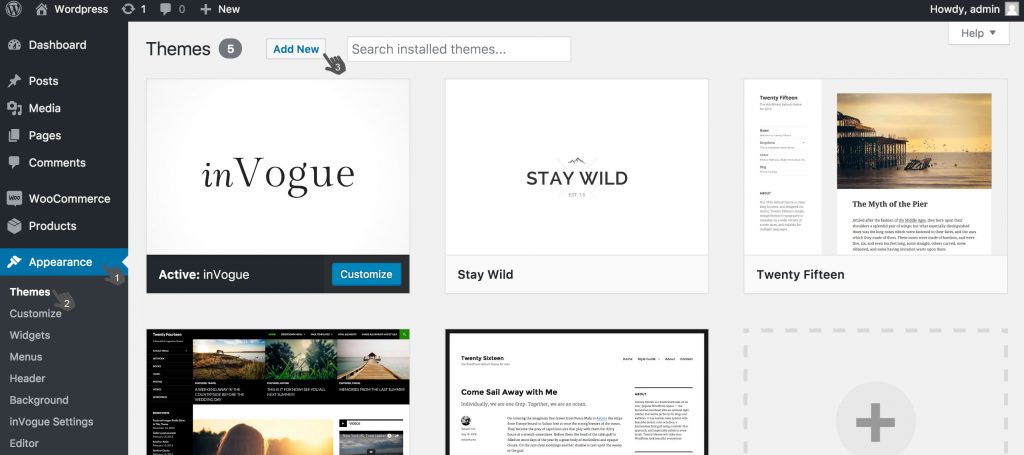
With the above-mentioned plugin installed and activated, you can navigate to the ‘Appearance > Themes’ page within the WordPress admin area. From here you can select the ‘Add New’ option.
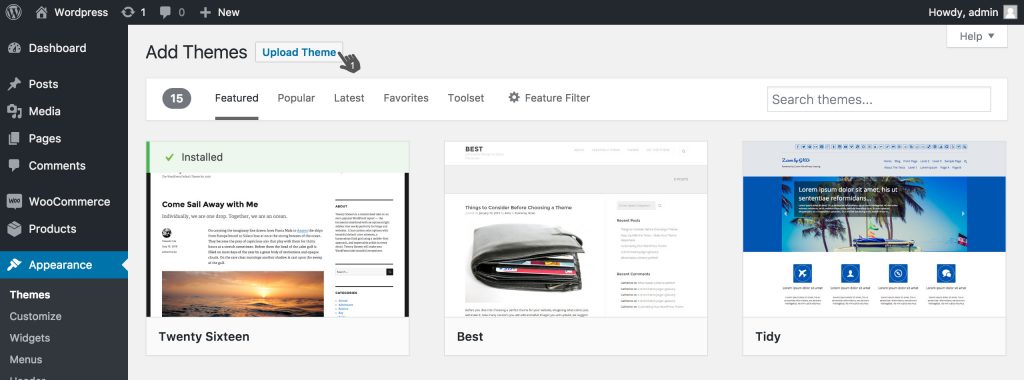
From the next page, you will choose the ‘Upload Theme’ option.
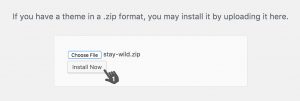
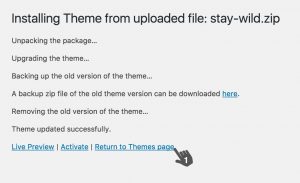
From the following screen, you can select the ‘Choose File’ button to locate the ‘stay-wild.zip’ file previously downloaded from Theme Forest.

Once located and selected you can click the ‘Install Now’ button.
This will run the theme update process and the update is complete.
Stay Wild is compatible with the WPML plugin! WPML can be used to create a multilingual site and translate your sites content into multiple different languages.
WPML is not bundled with the theme so will need to be purchased separately, you can purchase WPML directly from within Stay Wild by navigating to the ‘Stay Wild Settings > WPML’ tab:
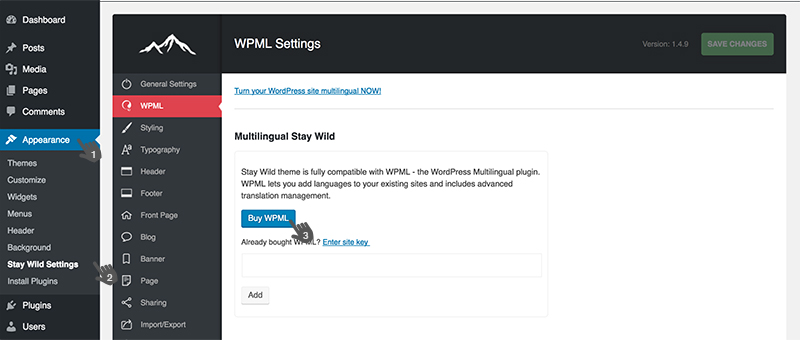
Or by navigating to this link:
Once purcahsed your WPML license key can be added to on this tab.
You’ll need to then fully install the WPML plugin through your WordPress admin area. You can do this from the ‘Plugins’ page, please ensure you’ve installed and activated the WPML core plugins (WPML Multilingual CMS, WPML String Translation, WPML Translation Management) before activating any other plugins that might depend on them.
GETTING STARTED WITH WPML
Once the plugins are all installed you can begin configuring WPML for translation to the required languages. Please take a look at the WPML starter guide here: https://wpml.org/documentation/getting-started-guide/
To begin translating the content of your pages and posts you’ll need to edit each page and post and create duplicates which are then ready to be translated. WPML will help by maintaining your link structure across duplicates to makes sure the translated content is displayed when users switch between site languages.
Within Stay Wild if there are any specific pieces of text which don’t fall under the content of a page or post such as buttons or extra bits of text you’ll be able to use WPML String Translation to also update these sections.
NOTE: It's that festive time of year again and we will be taking a short break to recharge from the 16th of December 2020 until the 3rd of January 2021. During this time our support will be limited but we will try to respond to high priority tickets as best we can. Have a great holiday!
OUR HEROES WILL BE HANGING UP THEIR CAPES FOR A SHORT BREAK!
We'll be out of office from the 2nd of August until the 18th of August 2019. Please note that during this time we will not be available to assist with support queries but will be right back to assist from Monday the 19th of August 2019. We appreciate your patience and support!
While we will always do our best to get back to you within an hour or two, we ask that you please allow for a maximum of 24 hours for feedback.
Monday to Friday, 9am to 5pm in the UTC+2 Timezone.
Bug fixing
How to questions
Assistance with integration
Support for 3rd party plugins
Custom Coding
Theme customization
Stay informed about all new releases and product updates